Popcosmo

EXTRAS

Milk & Cookie Shot Recipe

DIY, EXTRAS, RECIPESKim & Chloe7 Comments
diycookieshots.jpg

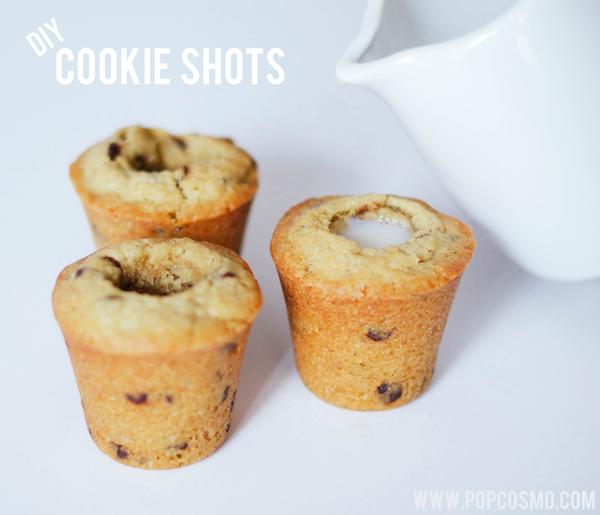
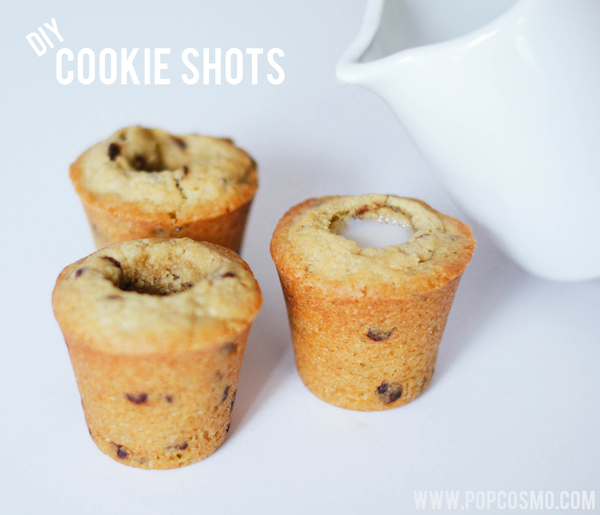
The rage with cronuts by Dominique Ansel's Bakery are are being followed up by his hugely popular milk and cookie shot. Recreating his cookie shot is right up there at the top of our list of favorite recipe posts (along with how to make glitter lollipops and the best cake pops) we've brought y'all, because somebody (us!) had to taste test every single chocolate chip shot to make sure it was up to par. And we now have a signature dessert to bring to book club, Kentucky Derby parties, wedding showers, well… just about any party. And clean up is a snap: just down the milk and eat the shot glass. Couldn't be easier. Although there are a variety of recipes we tested, we're sharing our winner: the most simple one that didn't leak and didn't involve an extra layer of glaze to seal the cookie. (But there are glazes below.)

DIY Milk & Cookie Shots

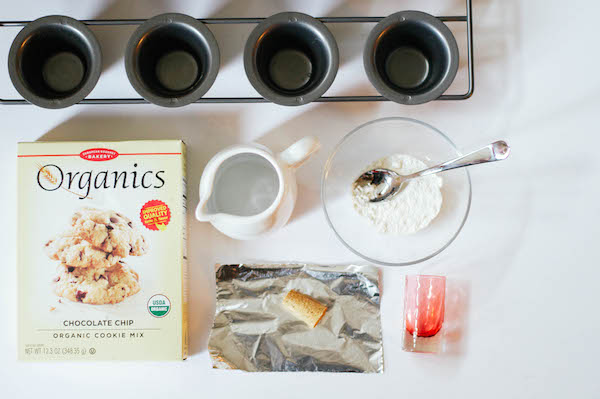
Ingredients: chocolate chip cookie mix mini popover pan tinfoil corks shot glass flour milk

ingredients for cookie shots

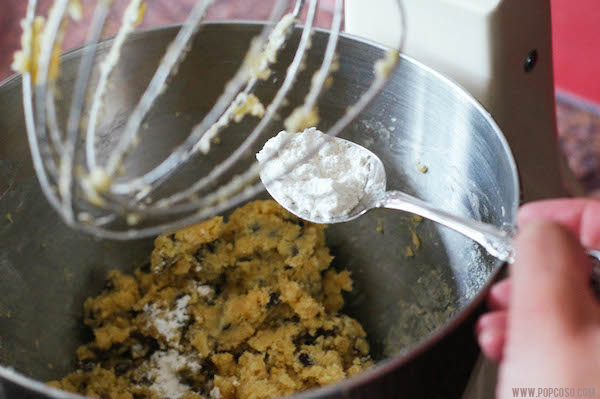
Directions: Follow the directions of your cookie mix or use your own chocolate chip cookie recipe. However, add flour to your mix after you have completely mixed yours together. We added between 1/4 - 1/2 cup to ours in order to create a dense cookie mix. Then mix in the flour.

cookie mix for cookie shots

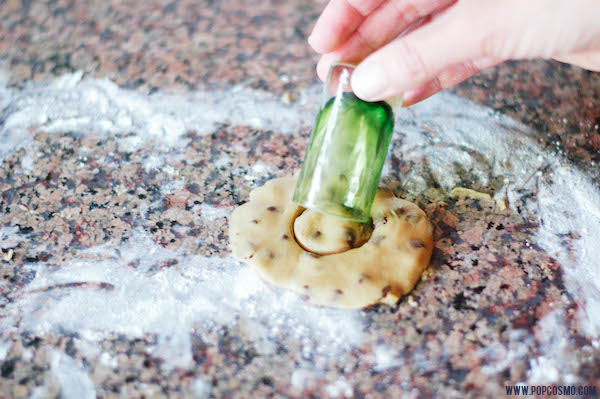
Roll out some of the dough about 1/4" thick and use the shot glass to cut circles. Place the circles on the bottom of each popover mold.

cut circles for cookie shots

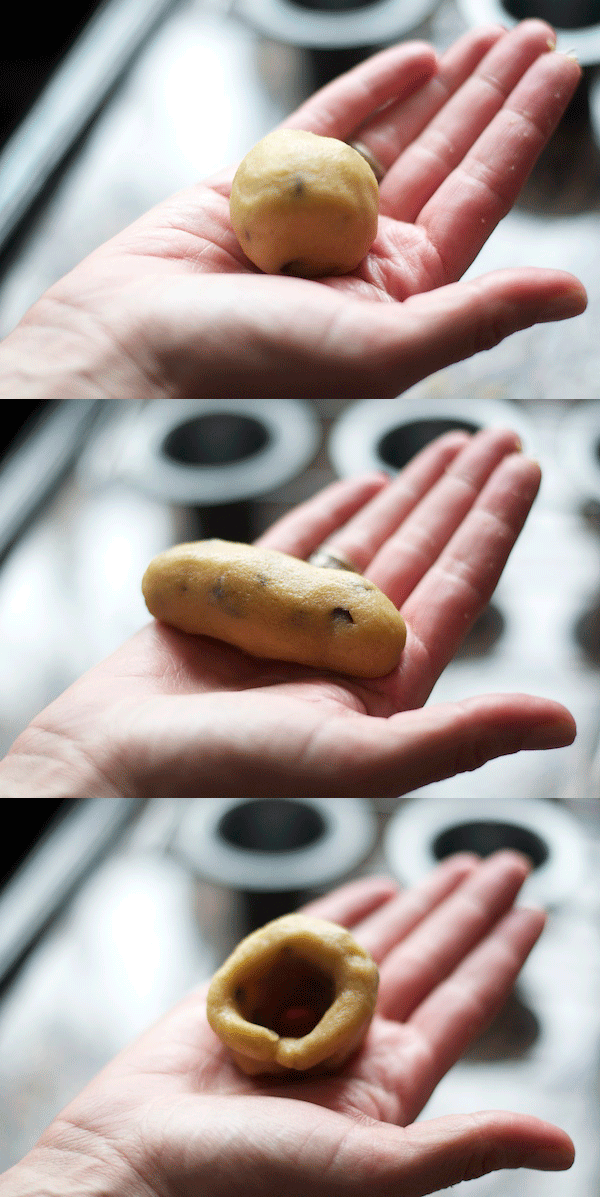
Take pieces of dough and roll into a ball, then a log shape, then flatten and place in a the popover mold being certain to attach it to the circle on the bottom so that no milk will leak through the seam. You'll see that our cookie shots are rather thick. This is intentional! They are thick and dense (and yummy!) and why no glaze is required.

rolling dough

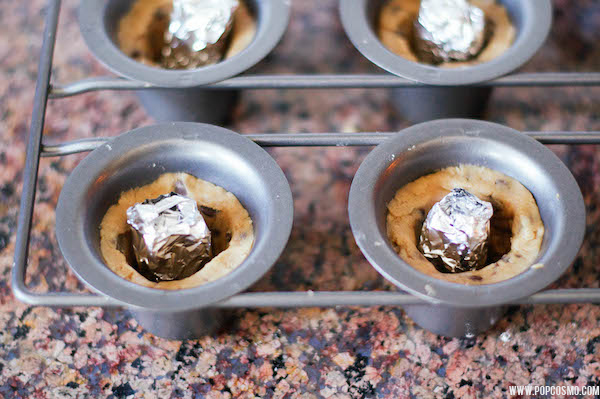
Take your cork and roll it in tinfoil, then place it in the center of each cookie shot. This will prevent the cookie shot from falling into the center.

corks for cookie shots

Bake until brown, or like us - the maximum time suggested, and let cool.

chocolate chip cookie shot

If you would rather have a thinner "shot" wall, then you might need a glaze. Whichever you choose, be sure to coat the inside of the "shot" well so that there are no cracks and pour off any excess. You can use:

  • dark chocolate and melt it. Pour and coat bottom and sides, then chill.
  • magic shell for ice cream. Coat all sides and bottom, let harden
  • confectioner's glaze: a little bit of confectioner's sugar + a small amount milk + vanilla. It should have the consistency of thick paint. Paint it on the inside with a clean paintbrush. Chill overnight, then bake for 5 minutes (so you might want to initially bake your shot for the minimum amount of time or until just barely brown).

Add milk (or kahlua or...) and enjoy!

FYI:  we let our chocolate chip cookie shot hold milk for 4 hours in the refrigerator for the sake of testing. We couldn't wait any longer in our taste testing gorge-fest to see how long these would last. They were far and away the best cookie shot glass recipe we made: no leaks, fabulous consistency & no need for a glaze. Plus, we realized that if the milk sits a while, it makes them taste like chocolate chip cookie cake. Yum.

Enjoy and let us know how your shots taste!

Cinco de Mayo Playlist

EXTRAS, MUSICKim & Chloe6 Comments
cinco-de-mayo-playlist.jpg

songs for cinco de mayo

Cinco de Mayo will be here before we know it. It's one of our favorite holidays and we used to throw killer Cinco de Mayo parties. Not only because there's a birthday in the house so it's double the reason to celebrate, but also because it's such a colorful holiday. It's one of the easiest parties to throw together because the theme is built-in for you, the decorations are plentiful and the color scheme is as wild as you want to make it. Piñatas, margaritas, crazy hats… you name it, everything is full of color! It's the perfect party for the whole family.

Whether you are having a fiesta, celebrating spring, a birthday, or just looking for an excuse to party… we have a Cinco de Mayo playlist for you.

Our Cinco de Mayo playlist on Spotify

spotify cinco de mayo


Happy listening!


Louisville Eats: Wiltshire Pantry

EXTRAS, RANDOM STUFFKim & Chloe7 Comments

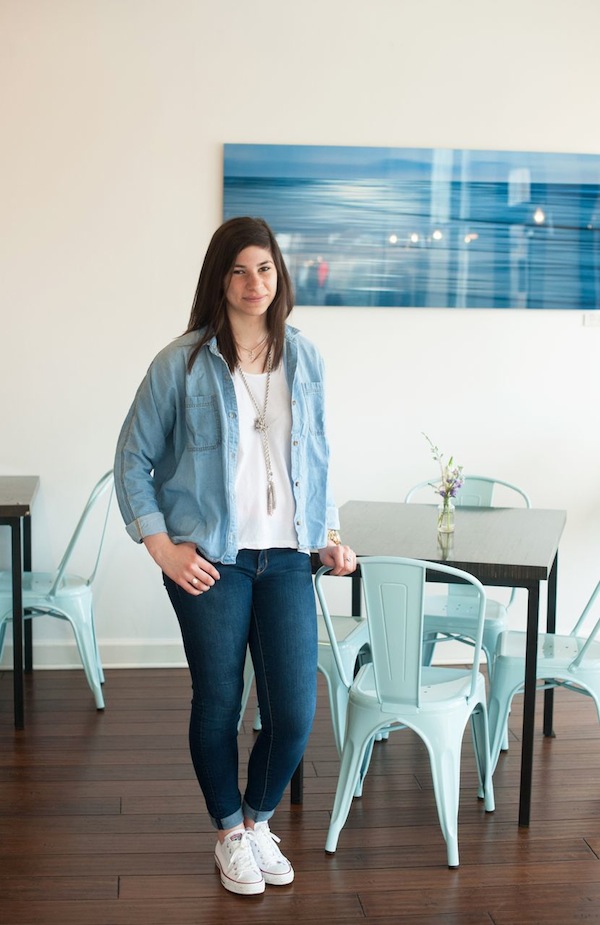
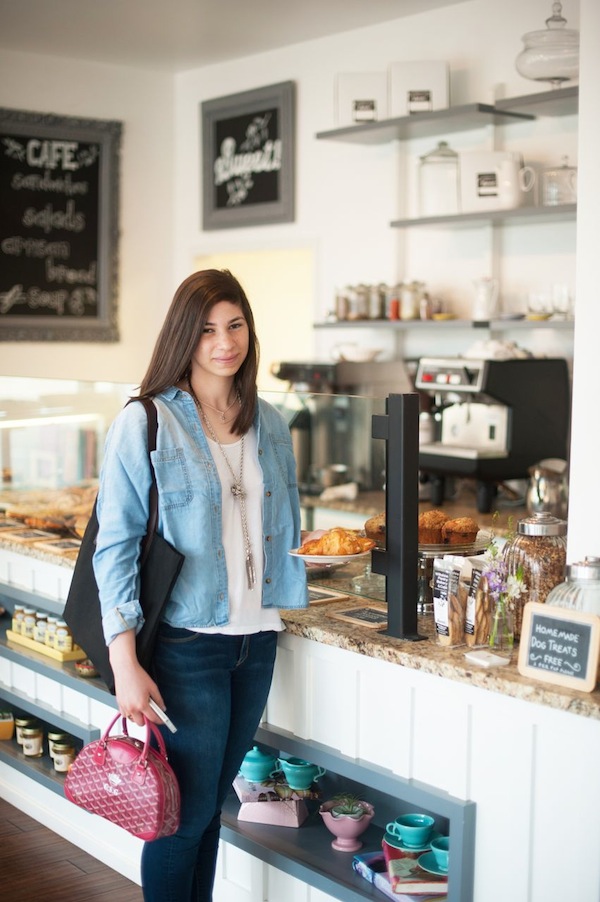
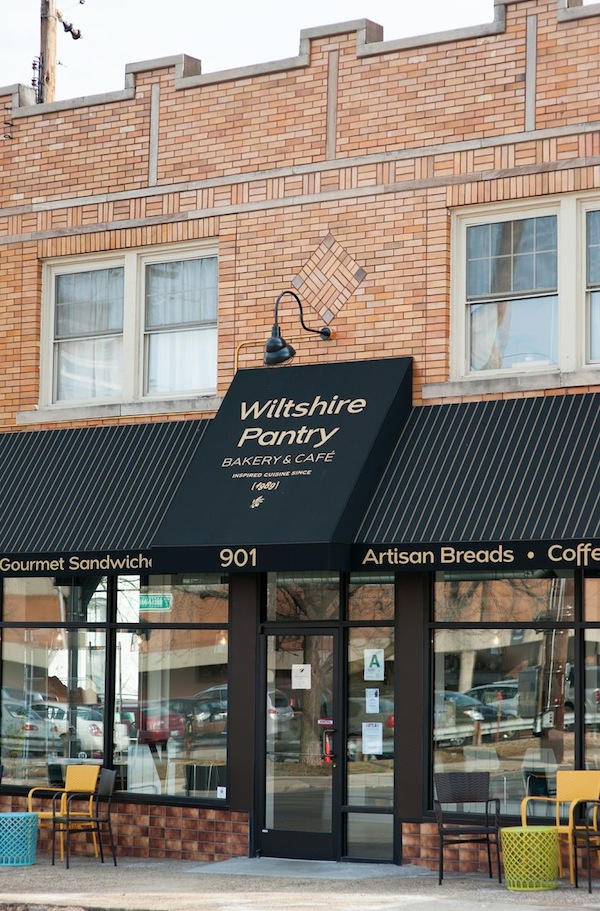
My mom and I have been eating out a lot lately and continue to seek the best of Louisville lunch spots. It's sort of our mid-day break from work and school. And I mentally take these spots and think could I do school work here? Another question I ask is how healthy is this food for me as I try to get in shape and eat right. And I also want to be in a place that's friendly and kind, with good energy. Wiltshire Pantry Bakery & Café is a checklist filler! It's serves vegan and gluten-free options, which are surprisingly hard to find in a city as big as Louisville, and Terry makes me feel right at home every time I walk through the door. I wish I could say I was unique, but she seems to know everyone! And with soup specials every day that sound creamy but have bases of nuts or vegetables, and salads and sandwiches that make me want to come back every day, I know that I'm not veering off-course of my healthy trend.

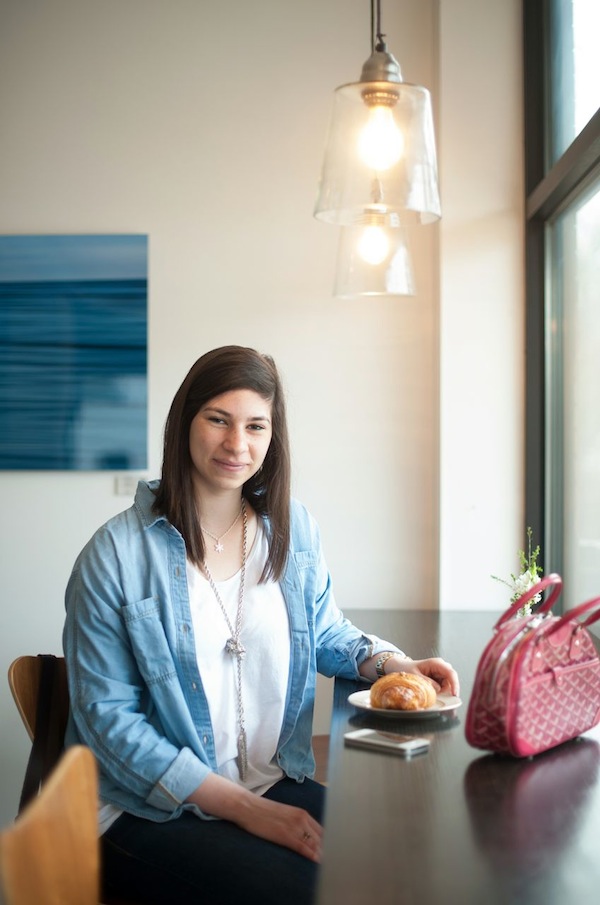
My "study and brunch" outfit of denim on denim is a look I’ve never really been a fan of, until I recently saw a picture of a girl on Pinterest who was wearing her denim shirt with a white tee underneath and I loved it! So I copied her as any good pinner would do. I think I like it… who knew a simple tee (well, my new amazingly soft tee that fits perfectly, actually) could completely change a look?

Jean shirt and jeans

Everlane tote and Goyard bag

Wiltshire Pantry

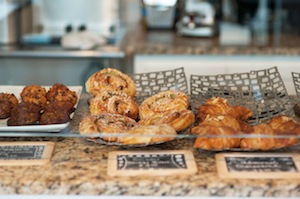
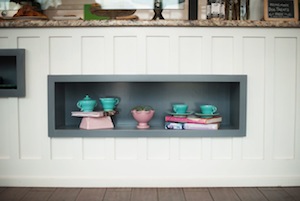
pastries Tea set

Everlane tee & jean shirt

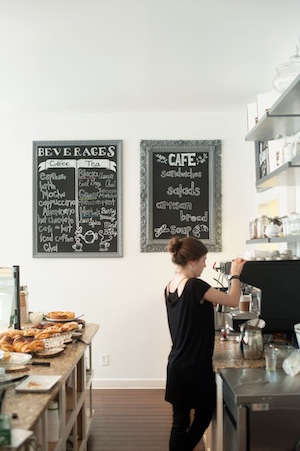
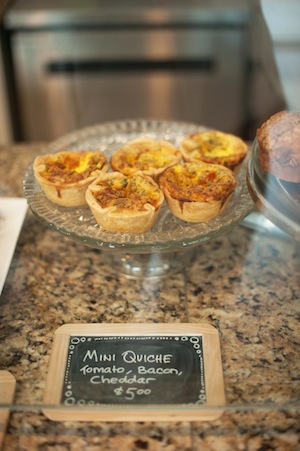
Behind the Counter Wiltshire Pantry Quiche Wiltshire Pantry

shirt / tee / pants (similar) / shoes / tote / purse - Goyard / lariat necklace

You know where to find me… but what's your favorite brunch spot like?

xox ~chloe

best louisville wedding photographers

Instagram Loves

EXTRAS, RANDOM STUFFKim & Chloe3 Comments
instaloves2.jpg

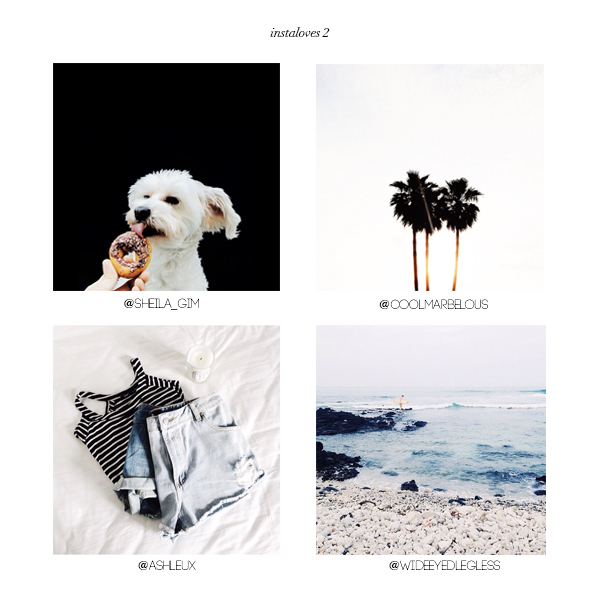
If I was a social media site I would most definitely be Instagram. It’s seriously my favorite by far (well, y'all probably know pinning on our Pinterest is a close second). I could scroll through my feed for hours, and I always become giddy when I find a picture that’s worthy of double-tapping. I also happen to get a little too excited when I discover a new Instagram feed that’s impeccably curated. Here’s round two (be sure to check out Instagram Loves: round one) of my favorite Instagram accounts as of late….

instaloves

@coolmarbelous: this feed is perfectly minimalistic. Sometimes plain white backgrounds can be uber boring, but the Cool & Marbelous team makes white look fabulously chic. Go follow them now, you won’t be disappointed!

@sheila_gim: Sheila’s feed is bright, bold, and beautiful with wonderful hints of darkness (i.e., the picture above). If I could step into Sheila’s life for a day, I would be so, so excited. Sheila also works with DesignLoveFest a lot, so there’s a chance you’ve seen her photos floating around the internet.

@ashleux: Ashley’s feed never fails to inspire me to see the beauty in everything. Seriously, she managed to make even the ordinary look extraordinary. If you love when an Instagrammer’s feed meshes together perfectly, then definitely go follow Ashley!

@wideeyedlegless: Madeylnn’s feed is also super gorgeous and minimal. I think it’s so inspiring how she can make something so simple look so beautiful and elegant. If you’re a fan of minimal, then this will be your new favorite feed. Sometimes I wish I could like her pictures more than once ;)

Hope to see you Instagramming! xo ~chloe

Cupcake Toppers

DIY, EXTRAS, RECIPESKim & Chloe7 Comments
cupcake-toppers-copy.jpg

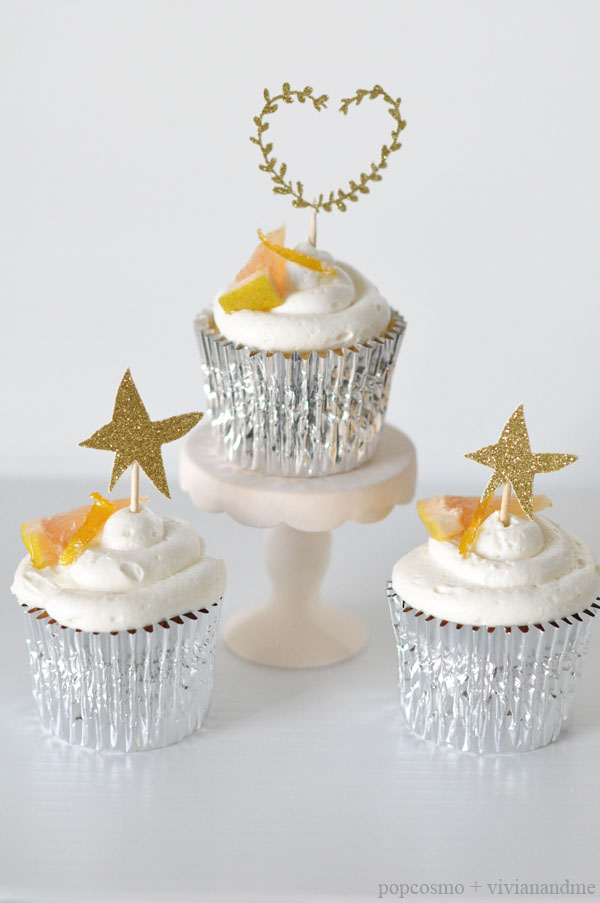
cupcake toppers Cupcakes are the cutest of desserts: a mini cake that you don’t have to share. Because when it comes to dessert, sharing isn’t fun, it’s stealing. One thing I love seeing lately are cake toppers. They are such a cute way to add a little extra something special to a cake. A cherry on top, if you will.

However, I haven’t really been seeing anything that goes on top of cupcakes. I mean there are those cheap plastic rings that grocery stores put on top of their cupcakes, but those don’t really count. So I thought to myself, “wouldn’t it be fun to make a little something for the top of cupcakes.” And because this thought seemed rather rational compared to my other ones (ie “is a banana still edible if you spray paint the outer peel and then eat the inside?” or “if the sun was black would the sky be black or just a darker blue?”) I decided that I should make a few cupcake toppers!

cupcake topper DIY

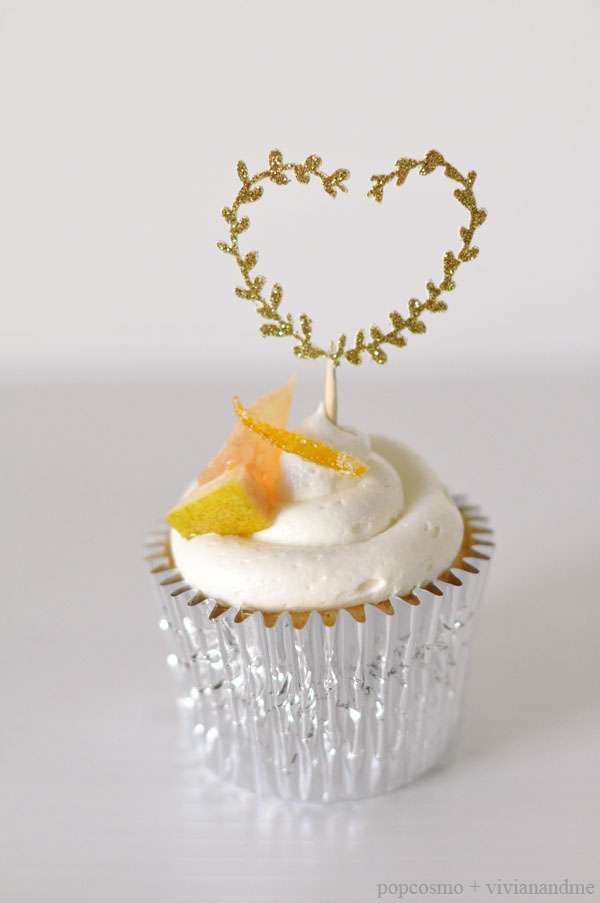
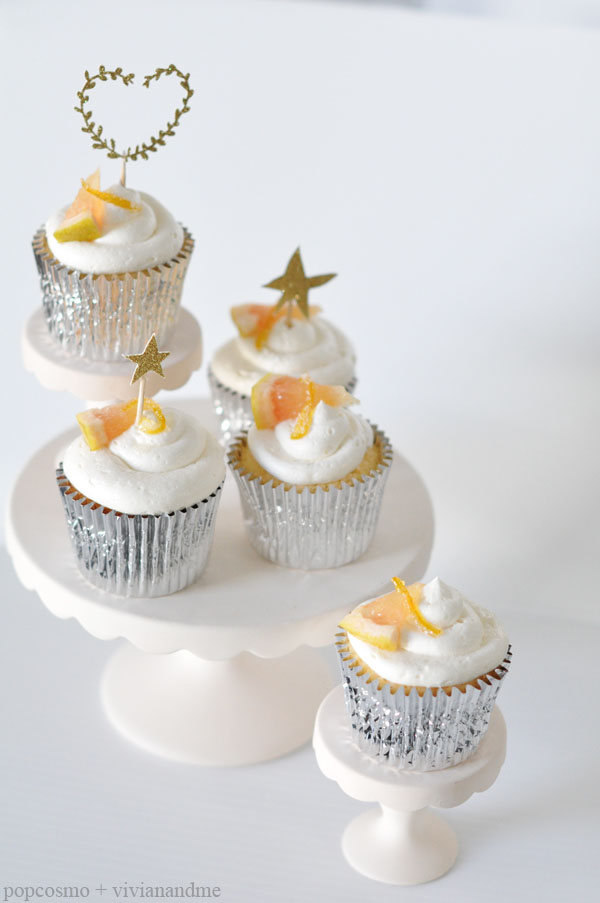
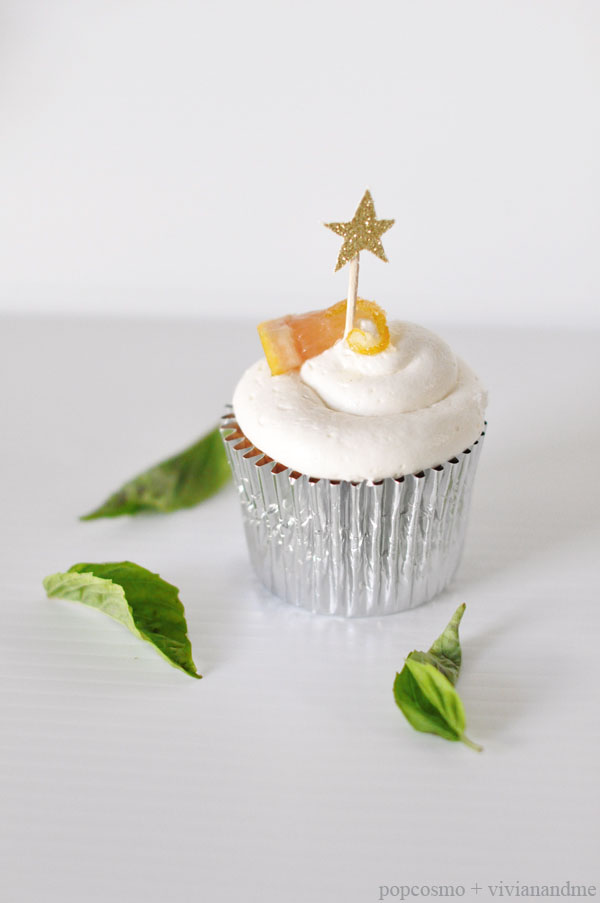
The star is a classic shape, & when you make the star gold you can channel your inner Rachel Berry, from Glee, because she puts a gold star on everything she likes. Plus, I’m assuming she likes cupcakes, so we’re actually just helping the Rachel Berry cause. I also thought we could get more intricate and make a trendy leaf heart shape.

And aren’t these cupcakes just absolutely gorgeous? We partnered on this post with our fab friend Hunter, of Vivian & Me, who writes a blog about allergy-friendly food recipes. I can not wait to try out these insanely gorgeous basil infused pink grapefruit cupcakes that have a vegan buttercream frosting and candied grapefruit on top! So be sure to stop by her blog for the cupcake recipe &  more amazing, mouthwatering, insanely yummy recipes (buffalo chicken dip, anyone?). And tell her we said "hi!"

Grapefruit-Cupcakes

Directions for toppers:

With the brand new, awesome Cricut Explore (it's on sale right now!): 1. Insert a picture of a star to your Cricut Design Space (we drew our own in Photoshop so it would look kind of rustic and imperfect). If you would like to create our heart & leaf shape, we’ve attached the file below so that you can upload it to your Design Space 2. Print it out on your paper of choice - of course we chose glittery gold! 3. Hot glue the shape to a toothpick 4. Let it dry 5. Then decorate your cupcake until it looks like a masterpiece - maybe Hunter at Vivian & Me has some tips on piping icing that we'll share soon ;)

xo ~chloe

Cricut leaf heart


cupcake topper

8 links I love this week

EXTRAS, RANDOM STUFFKim & Chloe2 Comments
gorgeous-hairstyle.jpg

I've been so inspired this week, despite having a "thumbs-down" day earlier this week (as you know, if you're following along on Instagram). But the week is improving, and here's what has me swooning.

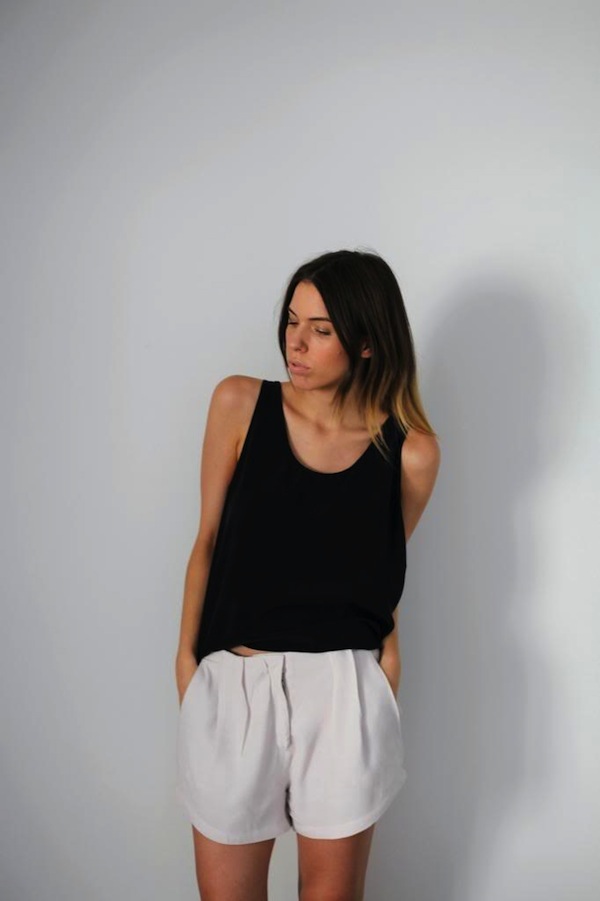
black and white perfection

I’m crazy obsessed with ^ this simple outfit. Black & white perfection.

I’m currently taking a "Lettering for Designers: One Drop Cap Letterform at a Time" on Skillshare. I swear SkillShare has something for everyone - it's the most amazing thing since the creation of pre-made cookie dough.

I recently purchased this shirt so that I can wear it when I go running and literally be a walking (or rather running) definition for the word “ironic.”

I'm ready to play golf. And this golf  / croquet DIY would be perfect for a lawn party & so Alice in Wonderland.

Because nothing's hotter than a man in a suit on a penny board. Or a surfboard.

Over spring break, I will be chopping my hair so that it’ll mimic this gorgeous hairstyle. (image on main page)

The real definition of “rebellious.”

Buzzfeed quizzes are my favorite way to waste time (that is, besides Pinterest and Youtube).

How about you - what's keeping you inspired?


Art on my mind

College, EXTRAS, RANDOM STUFFKim & Chloe8 Comments
h2_23.14.8.jpg

As many of you might know, I’m a junior in high school. This means almost everything on my mind is related to college in some way. Stressful? You betcha, I’m just lucky that I don't stress out easily.

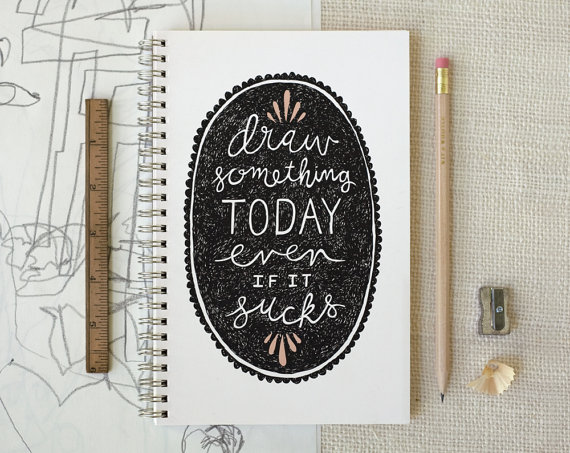
sketch pad inspiration

via Etsy

Anyway, I really want to major in Communications Design - which is sort of like a graphic design major. However, at my dream school (which shall remain nameless for fear of future embarrassment if I don’t get in) in order to become a part of the Communications Design major you have to take a full year of other art classes including Drawing and Painting. Although I am a quick learner when it comes to graphic arts and photography, drawing and painting are definitely not my forté. At this point, the only things that I can confidently draw include stick figures and trees. This is not a joke.

In order to even be considered at my dream school or other similar schools (because hey, I'm realistic) in my dream major, I have to submit a portfolio. I have plenty of graphic design and photography pieces to submit, but when it comes to drawings and paintings, yeah… I’ve got nothing. Because my parents are awesome, they have allowed me to start taking art lessons with a local teacher. My first lesson is was Tuesday, and saying I'm excited about my classes would be an understatement.

My point? I wanted to share a few pieces that I find remarkably inspiring. I also wanted to see if y’all would be interested in me sharing my art journey. I was thinking that once every few weeks I could show you a few pieces of work that I had done or a few pages of my sketchbook. Thoughts?

xox ~chloe

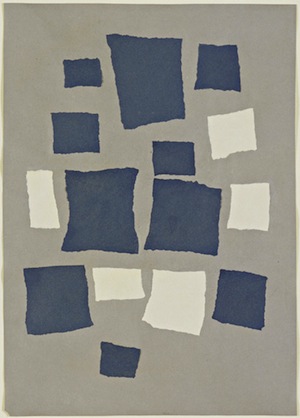
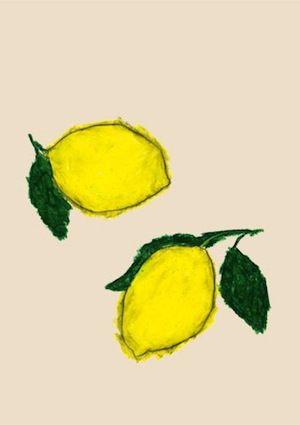
art in the style of dada lemon art

left / right

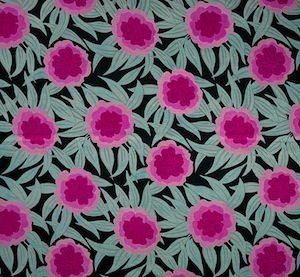
Paul Poiret printed linen art wire sculpture by Calder

left / right 

Styling Tips for Fashion posts

BLOG TIPS, EXTRAS, FASHIONKim & Chloe5 Comments
DSC_3305.jpg

When we revamped our blog last year and started adding fashion posts (of OOTD or WIWN variety) we started scouring our favorite blogs to see what style of posts captured our attention when saw them on the page. We checked to see which posts made us stop in our tracks and look to see what they were wearing, and which posts had cute clothes but didn't really keep us on the page. We developed a checklist of a good style post that we kept in our head, but now it's time to share with you! fashion blogging tips

via Sea of Shoes

  1. Do not have backgrounds growing out of our heads or bodies! (i.e., trees, poles, etc)
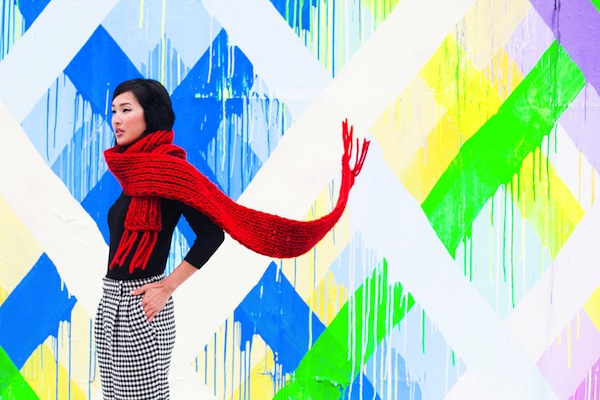
  2. Movement and playfulness capture our eye!
  3. Natural light is best and the golden hour is the most flattering
  4. Show the whole outfit in at least 1 photo
  5. Vary the background according to the outfit
  6. Blurred out backgrounds focus the eye on the clothes
  7. Show detail shots, especially of accessories or interesting shoes
  8. Varying angles add visual interest
  9. Have enough photos, but not so many that just becomes repetitive
  10. Have fun & try to look natural, not forced

Someone who inspires our checklist? Gary Pepper Girl! Ok, she does travel to exotic locales practically every day, so of course her photos are absolutely to die for. Plus, many are taken by her boyfriend, so you know he is going to capture her in the most amazing, flattering light and position. But seriously, could her clothes, settings, and photos be any more swoon-worthy?

How to take a great OOTD picture

Winnie Detwa has one of our favorite Instagrams because her photos are ethereal. Most have an earthiness to them (go check out her blog and instagram to see) which is why this photo has always stuck in my mind! Plus, she happens to be one of the nicest people I've (Chloe) met. See how bold she is by having a solid against a solid?  The impact of the pink would be lost against a splashy background. Her eye is just so darned good and we'll always look to her for styling tips and inspiration!

best fashion instagrams

How amazing is Jessica of Tuula Vintage in this picture? A simple silhouette with a remarkable background.

how to take great fashion blog styling tips

via Tuula Vintage

Of course, this is only our list, and if you think of some major bloggers, they make their own rules which just goes to show you that you must create your own checklist and stick to what works for you! Some bloggers have the same background in most of their posts and only show one or two photos or don't even describe what they're wearing. But isn't it better to want more from a post than be overwhelmed? And some go to the other extreme and post such busy pictures that it's hard to tell if they have travel or fashion blogs; but,that's why there are so many blogs! We each have to find our own niche, our own comfort zone and just. rock. it.

Our list of styling tips works for us. Today. But it might change tomorrow, and each season brings a different perspective and each shoot has a new focus. Sometimes we hit a lot of points, sometimes we don't, and that's what makes creating our posts fun and challenging. Plus, where would we be without our beyond incredible photographers, Erin Trimble and Susan Stewart?  A fresh perspective and trained eye is always helpful and it's brought 2 new friends into our lives!

Who are your favorite fashion bloggers… and why do you like their posts? We'd love to hear what's on your list for a good fashion post!

What is #ChicChat?

BLOG TIPS, EXTRASKim & Chloe6 Comments
chicchat.jpg

The best twitter chats Each week on Tuesday from 9-9:30 EST, Chloe hosts #ChicChat. Although Chloe originally thought about having a chat for teens, #ChicChat has quickly evolved into a chat for bloggers of all ages who blog about various topics. Weekly themes are relevant to most bloggers, whether you blog about fashion, sports, lifestyle or crafts. We've discussed Past topics have included blog design and how to stay inspired, and networking, but the most popular chat so far was definitely the chat this week with our guest Robin Zachary of Prop Closet who answered questions about styling photos. As a former Creative Director of Bridal Guide Magazine, and present day stylist and teacher at NYC's Fashion Institute of Technology, she knows all the ins & outs of photo styling and spent her time busily answering questions!

Another highlight of #ChicChat is that we really get to know each other and connect on Twitter. Something that can be hard to do in a forum that where tweets bombard you faster than the temperatures have been changing lately from winter to spring and back again!

If you are new to Twitter chats and need some tips before joining, Chloe wrote a post explaining twitter chats for newbies. <---just click!

So drop any Tuesday between 9-9:30 EST… we look forward to chatting with you!


What to Wear: College Visits

EXTRASKim & Chloe14 Comments
college.jpg

This past weekend my family and I made a quick road trip to St. Louis for a college visit to check out Washington University. I had an interview and two tours scheduled; but, along with a few important things like remembering my resume and refining my answers to questions like “why are you interested in Washington University?” another concern of mine was “omg, what am I going to wear?!” I've visited some other schools, but hadn't been to one that I was so excited to see, and I realized the night before my trip that I didn’t have any outfits planned out — I’m a last minute kinda gal! I frantically googled “what to wear to college interviews” and “what to wear for a college tour” but I came up short seeing that internet was lacking in advice for this scenario. But I think my outfits were reasonable after looking at what everyone else was wearing, and more importantly, I enjoyed my interview and had a blast on the tour. If you’re wondering, I fell in LOVE with Wash U. Hashtag dream school. ;)

College Interview Outfit

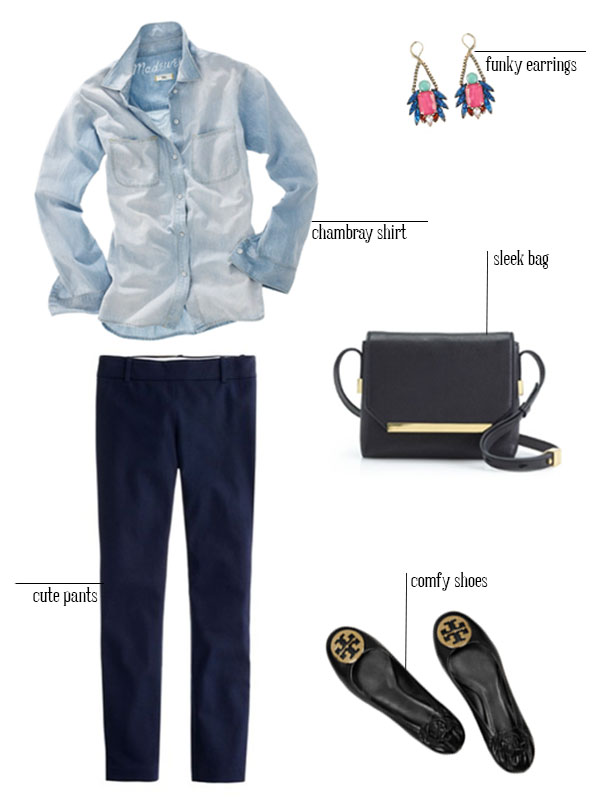
interview outfit:  top | pantsshoesbagearringsskirt

College Tour outfit idea

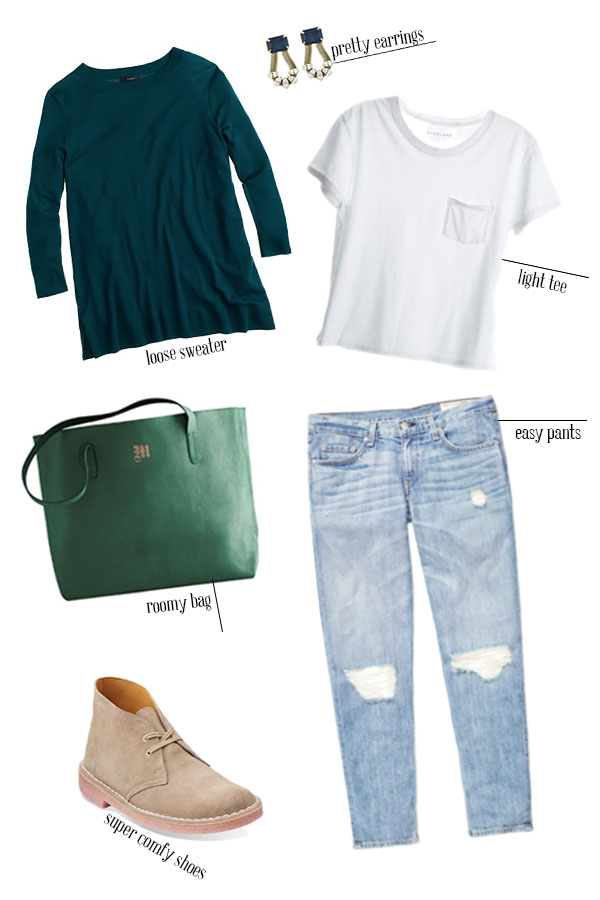
tour outfit: topsweater | bag |shoes | jeans | earrings

Because the internet doesn’t know how to help frantic teenage girls put together outfits for college interviews and tours, I figured I’d pick up the slack and make a set for you. I hope you like these outfits! They are super basic, but they definitely get the job done, and I’m 100% sure that you’ll feel 100% confident when you wear them. The goal of the interview outfit is to be comfortable, yet polished, but not so dressed up that you look like you are interviewing for a job. Some people were wearing jeans, but I felt more comfortable dressing up a bit and putting effort into looking respectable. I didn't want to wear a skirt, because I didn't want to have to worry about it while sitting down, but nice pants looked crisp and tailored. On the other hand, the tour outfit is something you should be very comfortable in and your shoes should be broken-in. Although our tour was only about an hour, there was a lot of walking. Be comfortable and prepared for all sorts of weather. We had 50 degrees one day and snow and rain the next.

Also, keep in mind that outfits aren’t everything when interviewing or touring: being respectful and kind and totally more important. Although that disclosure was probably super unnecessary, I though I should close with the manners always matter reminder!

xox ~Chloe


Calligraphy made easy

DIY, EXTRAS, RANDOM STUFFKim & Chloe10 Comments
learn.jpg

Learn Calligraphy online

In my childhood, I used to get these strong thoughts in my head about how talented I would be at something. I had this vision in my head of me becoming the next famous softball player, scrabble player, or baton twirler and begged my parents for lessons or to join a local team. My parents knew that these things probably wouldn't be my cup of tea and that I might embarrass myself in the process, but they let me take lessons and learn my lesson the hard way. I joined a local softball team and almost broke my hand by putting my hand in front of my glove to catch the ball (why!?), I lose at almost scrabble games (I still love it though), but my my mom  put her foot down when it came to baton twirling lessons, thank goodness. And now I'm not even sure why I was interested in taking those!

But I am totally into calligraphy and one of my goals this year is to become super-amazing at calligraphy. I recently took a class on SkillShare and haven’t looked back since, which you've probably noticed on our Instagram. I think this might actually be my thing. In fact, I might be {one day, if I practice} pretty good at it. *gasp* So since I’m basically a calligraphy prodigy (haha) I figured I better fill you in on a few tips since calligraphy is totally trending right now!

how to learn calligraphy

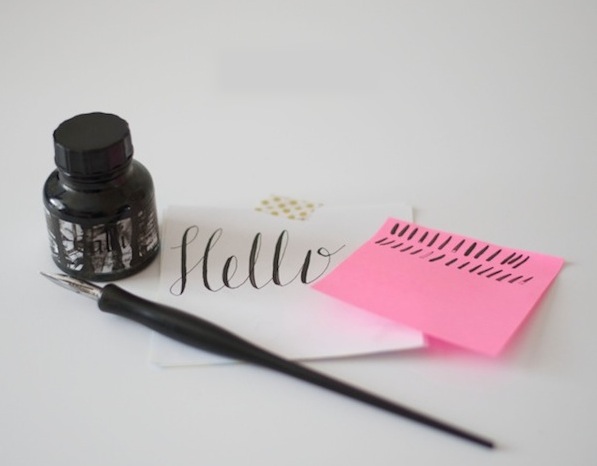
WHAT YOU NEED TO START CALLIGRAPHY:

Things to know :

-This is not your grandmother's calligraphy. But it can be if you want it to be. There are all styles of calligraphy, and I happen to like modern… not traditional.

-Calligraphy supplies really aren’t that expensive. You need:

  • nibs
  • pen
  • paper
  • ink

-You do not have to have amazing handwriting to start calligraphy. If you practice your style enough then you can totally pull it off!

-Calligraphy is super messy, at least for me. Make sure you aren’t writing on a nice desk, because ink will most likely be splattered all over it, and not in a chic way.

-Practice makes perfect, so practice, practice, and practice some more.

Places to learn calligraphy :

-Skillshare > search Calligraphy.  This is where I learned. Since I loved it so much, I'm going to be take more classes, maybe here, maybe one of the awesome places below, to keep learning! Uh, maybe this summer when school slows down. Junior year is buuussssy.

-Fake it ‘till you make it - not really calligraphy, it's, wait for it… how to fake it. Or if you want a true short cut, just buy the font.

-I still love Calligraphy - I don't know much about this, but it looks pretty.

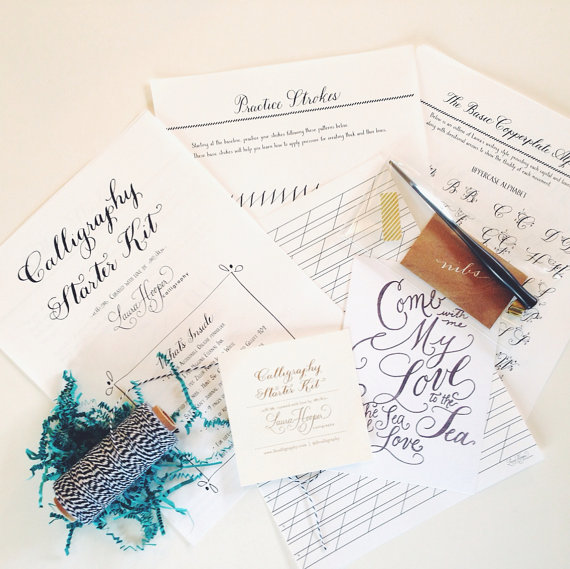
-LH Calligraphy has a a super-cute starter kit on Etsy and a gorgeous Instagram! The price is reasonable too.

how to learn calligraphyphoto via LH Calligraphy

Please let us know if you try any classes and what you think of them, plus tag us and show us your calligraphy skills on Instagram! xo ~chloe

IF YOU ENJOY THIS: check out How to Make A GIF {without Photoshop}


How to make a GIF… without Photoshop

All, BLOG TIPS, EXTRASKim & Chloe28 Comments
GIF221.gif

GIFs are all the rage, especially now that you can have GIFS on Pinterest, and there are tons of blog classes on how to make a GIF using Photoshop. But since Chloe is so proficient on Photoshop and the best I can do is turn it on, I haven't quite made it to a class. So when I found out about imgflip, I was dubious, but excited. I tried it out and was so impressed, that I wanted to share it with you! Get ready to learn how to make a GIF without Photoshop skills, y'all!

how to make GIFs

Here's how:

1. Take photos that you want to use to create your GIF or use graphics you've created. Save your images on your computer and make sure they are all the same size. Tip: If taking photos, the key to a successful GIF is to either use a tripod or have very steady hands. If you will be moving items to create a story, then definitely use a tripod since it's almost impossible to get your camera back in the same position, even if you have someone helping. We've found this to be true even when doing GIFS for fashion or style shoots. The less jiggle, the more successful your GIF will look.

2. Open up imgflip.

3. Click on the Images tab (top left).

4. Download your photos and arrange them in the order you want your story to be told to create your GIF. To remove a photo, simply drag it to the pink bar on the bottom that says "Drag images here to remove."

how to create GIFs

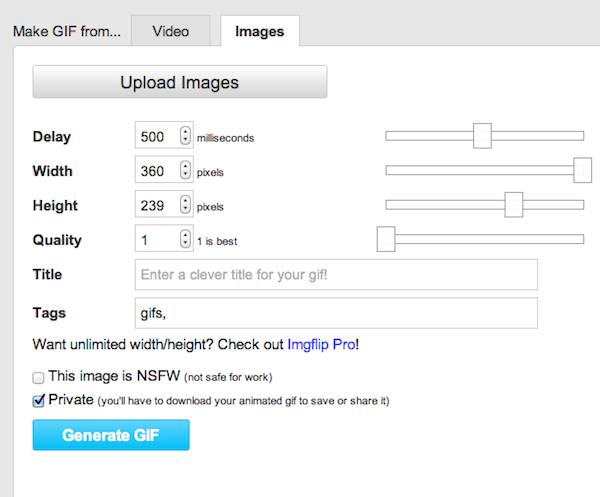
5. Once satisfied with your photos, set the width to 360 and height to 360 for a square photo (or 360 for the widest or highest), quality to 1, and click Private. Then click Generate GIF.

creating GIFS

6. Once downloaded, simply upload it to your blog like a regular photo (although after using it a few times, it will give you an image HTML which you can place on your website). Both are super-easy. And voilà, a GIF… and you didn't even need to learn Photoshop!

Creating the GIF is free, but the size is limited to 360 x 360, and supposedly there will be a watermark, and ad will be shown. To upgrade to the Pro version costs $9.95/mo. But as you can see, there is no watermark or ad in the one I created!

making a GIF without Photoshop

Have fun creating GIFs without Photoshop and leave your links to the ones you create in the comments below. We love creating and looking at them 'em!!

xo ~kim

Etc.

All, EXTRAS, RANDOM STUFFKim & Chloe7 Comments
ETC.jpg

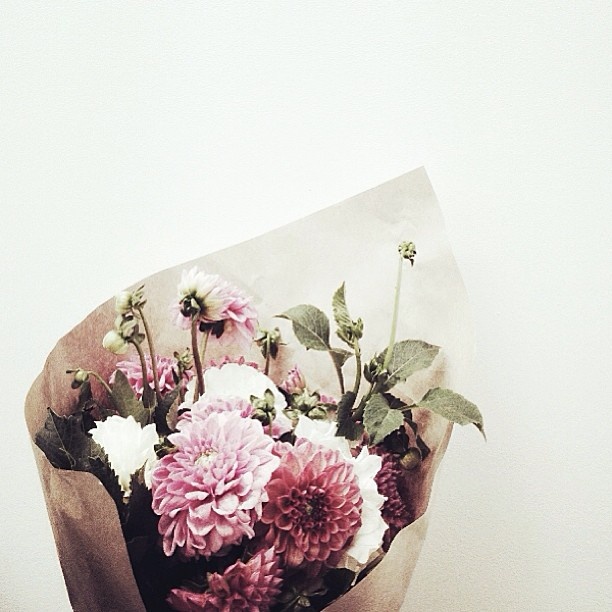
floral bouquetvia Pinterest

Hello, hump day. I hope y’all are having a fab week and staying warm in this insane polar vortex. Wishing all my friends and family in Alabama and Georgia stay safe and warm!!!

This past weekend I stayed home, caught up on some school work, and got lost on the procrastination machine also known as the internet. This week, I'm back to school work, and so caught up that sometimes I glance up at my clock and wonder what I was doing for the past couple of hours. But, I'm looking forward to another weekend! Because last weekend, while I was browsing for inspiration on the internet I discovered some lovelies that I want to share with you lovelies. So without further delay…

+ who doesn’t love a good old fashion chocolate cookie? finding the best homemade recipe is hard, but the every girl has got you covered.

+ selfies are taking over the world. but are they making us critique ourselves in an unhealthy way? check out this video to learn how to discover what makes you beautiful.

+ I recently bought a new pair of jeans, and I am overly obsessed with them. they are boyfriend jeans with the perfect wash. but guess what. the price is affordable!  go buy a pair (or two or three) for yourself.

+ after attending the amazing cricut party in salt lake city, I have been brainstorming all of the crafts that I am going to make. I think the first thing on my list are something similar to these adorable gold scalloped cupcake liners. too cute.

+ with valentines day right around the corner it’s time to start thinking about what you are going to give your friends & family. check out these free photoshop brushes to start off creating your digital designs.

Stay warm, and let me know what you find when seeking inspiration!

xo ~chloe

New Year, New Blog Design

All, BLOG TIPS, EXTRASKim & Chloe15 Comments
blogdesign.jpg

How to design the perfect blog layoutChloe and I are at it again… we can't seem to leave (almost) well enough alone and tweaked our blog design again. Maybe it's just the DIY-ers in us, maybe it's because we were on vacation and didn't have access to all our crafts, but one day, maybe it was a really snowy one, we just decided our website needed modifying. Again. Which got us thinking: what makes a blog design effective? What do we look for when we find a blog that makes us think gosh, our website needs updating yet again? Let's start at the top and work our way down, realizing this is what we like (i.e., tips) not hard and fast rules! Header: A header should be distinctive and express your personality and tell your reader who you are or what you do. If I had my way, Popcosmo would have one look and stay the same year to year. But that's me. Chloe, as a teen, is evolving and her taste is changing dramatically year to year. And since she is the designer, her opinion rules, so our header has changed frequently, but one element has stayed consistent: we've always had a heart somewhere in our logo. But we haven't been able to find a heart we like with this new logo!

Consistency is queen (behind creativity) even when your logo changes; but, if you're going to make a dramatic change, then more power to you. If you have a "signature," like our heart, then work around it. We tended to make a change when we rebrand, and then we tweaked the logo to and layout to better express us.

Also, popcosmo doesn't mean anything, we made sure that we mention that we "are a blog for moms, teens and everyone in-between" somewhere on our homepage. BOTH of these items (heart and tagline) are still being fiddled with by us, so check back to see how we resolve them :)

Here's our logo design evolution from our teen site to our present day mom/teen site above. The last two were designed by Chloe:How to design a logo Logo Design Logo Design


Navigation: Being able to access and navigate around a website should be easy. For instance, if it takes 3 click just to find a story, I'm leaving. Secondarily to reading what is on the landing page, you want your reader to be able to easily navigate through your site. There are typically 3 ways a reader will do this:

  • Menu - typically below the header or on the sidebar. Although they look great on the sidebar, Chloe designed ours below the header, which we both like the look of and the ease of for the reader. A simple drop-down menu is simple for the reader and instinctive when they are looking for where to go.
  • Search Bar - ours is above the fold on every page and critical since we have so many articles that go back more than a few pages
  • Highlighted Posts - We use WP plug-ins and saw a dramatic rise when we installed them. We also added some sections on the sidebar (those big black circles to your right) that weren't on the main menu (but are on the drop-down menu, i.e., Blog Tips). We also have our most popular posts highlighted on the sidebar. It seems a bit like overkill when I write this out, but each person reading a different story will see a different "popular" post or highlighted post and hopefully inspire them to linger longer.

Call to Action: Do you want your reader to sign up for emails or comment? Do you want them to pin a picture, G+, or follow you on Instagram? Then you have to ask very nicely, or hint very loudly, so we make sure our share buttons are prominent at the end of each story. I have to admit, we don't ask our readers to share enough (hey y'all, we love when you share, and we really love it when you follow us on Instagram or Twitter and especially when you leave a comment or share a DIY with us!) but the point is make sure you are asking your readers to do something when they visit you or they'll just pop by and leave.

Font and background:

Don't underestimate the power of design and font!  Chloe and I kid about it, but we'll absolutely pick a restaurant because of a cool font (hello Kitchen in Denver). Won't you leave a website that has a sloppy font and is impossible to read?

We do argue about centered fonts - I can't stand them, she loves them. So, this section is for her. Generally, script fonts are pretty but hard to read. 3-4 fonts should be plenty.  Since we are both font crazy, agreeing on fonts caused considerable arguments, but I think we've finally found a middle ground!

Sidebar: KISS. Yep, Keep It Simple, Stupid. We have so much information we'd love to put in our sidebar, but we just resist the urge. We don't run ads, so that's one thing that keeps it clean, but ads are $$$, so we are considering them. Just make sure they are kept to the same size or within the same block so it doesn't look cluttered. Another idea is to move your ads to the bottom of your sidebar or to the footer.
Happy Thanksgiving

Photos: The bigger the better. Yep, really. Well, sort of. Make them as wide as possible. Know your margins and make the width of your photos the same as your content. It's all about visual appeal and a photo that aligns with your copy is visually appealing. Of course, it can't always be the same width, so center them if they can't be as wide as your copy. If they are larger than your margins, then resize before importing to help with your website speed.

Here's why… you see the same photo above and below, but which looks better?

Happy Thanksgiving

Color: In this case, less is more. Generally, 3-4 colors make a pleasing web design palette and are visually appealing. But we've seen designs with more and less that also work. This is simply a style question of what best represents you, and is not jarring for your readers. Consider how much color will be in your photos / posts and make sure you won't overwhelm your reader, or conversely, that there will be enough color to interest your reader. But, don't forget about whitespace… it can be the difference between a good homepage and a great homepage. Whitespace separates blocks of information and can create balance on a page, which will give it uniformity without clutter.

Contact: Can your readers and brands reach you? Is your contact info on your homepage or readily apparent? Ours is on our advertising page, our press page, and who we are page. We want people to read about us to make sure it's a good fit, BUT we are considering adding an email icon to the homepage.

Consistency: Check the overall design for mood, consistency and balance. Consistency in design allows the eye to flow from one area to the next without distraction and enhances the reader's experience, which in the end, will make them want to come back. And isn't that what we all want?

Are there any web design tips you want to share? Or any web design quirks that drive you crazy? Or any web design advice you want to share with us?

xox ~Kim


Valentine's Day Date Dreamin'

All, BOOKS & MOVIES, EXTRASKim & Chloe8 Comments

WT-TRL-001448.jpg

Valentine's Day movie

Nothing, absolutely nothing, makes me happier than to get lost in a great book or movie. One that makes me forget where I am and what I'm doing. One that tells a love story in a unique way and touches me so deeply that I tear up a little, maybe even so much that I sniffle, and finally have to dig around for a tissue after when I can no longer pretend I have something in my eye. After watching the trailer for Winter's Tale, I've decided it's the romantic movie for my Valentine's Day date this year… and since it opens in theaters February 14th, I'm planning my perfect Valentine's dream night around it.

My dream Valentine's Day would be something like this…. it would begin with a flower delivery from from Lavender Hill saying, "Surprise, guess who's coming home tonight?" {My hubby commutes from the west, so this would be the perfect start to the perfect date, obviously!} I'd have his favorite drink to greet him, the only kitchen-ly duty I'm good at, and since he was a like a fish to water during our  bourbon tasting, I'd make him an old-fashioned. Then we'd head out to his choice of restaurants because he's the foodie. We have so many amazing restaurants in Louisville like Proof on Main or 610 Magnolia, that I'm happy anywhere he chooses as long as there is champagne involved.

A Winter's Tale Movie

But I'm in charge of entertainment. We both love a good tearjerker movie, so the highlight of the evening will be 2 hours of uninterrupted romantic escape at Winter's Tale. It's the perfect night to see a romantic movie about crossed destinies and romance through the ages. Plus, what a cast! I'm a huge fan of Colin Farrell, who is always the perfect mix of charming and witty. And it also stars Russell Crowe, consistently tough, and Jessica Brown Findlay, who we all might know better as Lady Sybil Crawley / Branson from Downton Abbey. An Oscar-worthy cast, right?!

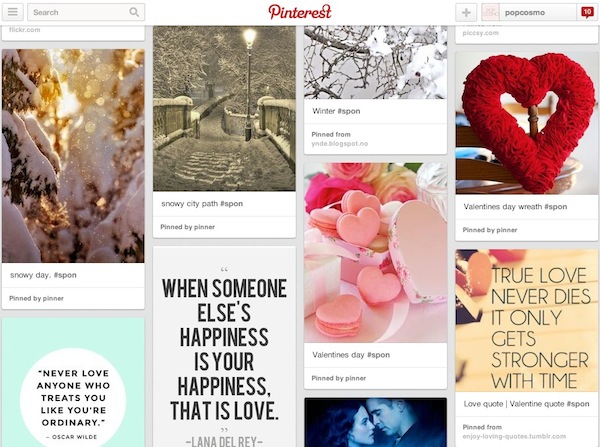
I'm even pinning Valentine's ideas here to get ready. Follow along!

Winter's Tale Pinterest

And if all goes well, the night of romance may just be beginning when the movie ends….

Disclosure: This post was sponsored by WB Winter's Tale through their partnership with POPSUGAR Select. While I was compensated to write a post about WB Winter's Tale, all opinions are my own.

Really Cool Business Cards

All, BLOG TIPS, EXTRASKim & Chloe7 Comments
CARDS2.jpg

You all know that I I adore designing websites and and logos and have really enjoyed being able to design them for other people. So it's no surprise that I'm obsessed with looking at other peoples websites. But what I love even more than websites is business cards. Perhaps it's because my mom always says that "you never get a second chance to make a first impression." And when it comes to introductions of your blog, website or business, this advice is also true, which is why I think my mom and I are obsessed with business cards. When someone hands me a card that feels good, looks good, and somehow captures their character or the character of their blog, then I am totally impressed. And what do I do when I'm impressed (besides gushing so much that I not only embarrass them but also make a fool of myself)? I scope out their website! And isn't that exactly what you want someone to do when you hand them your card? As we've probably mentioned, we were at the #CricutExplore event sponsored by Cricut earlier this week. We were humbled to be invited with so many top crafting bloggers and meet people we'd been reading. We received some cool business cards, just a few of which we'll share with you. I wish we could have gotten a card from everyone (and I wish I could have taken the entire week off and stayed for Alt so I could have seen and learned more)! Next year….

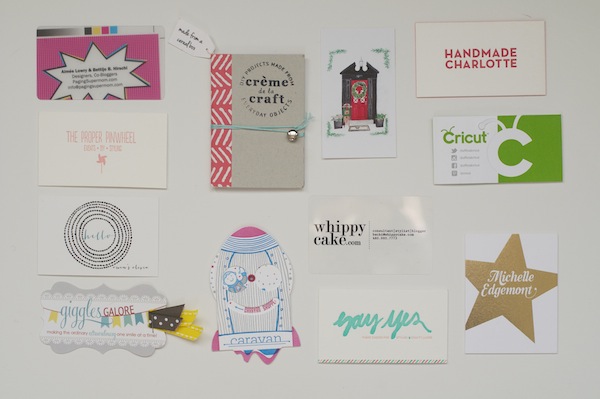
cool business cards

left: The Proper Pinwheel's card is packaged in a clear pillow enveloped with an included tiny DIY banner in her color scheme and glitter dots and paper shreds which makes you feel like you are unwrapping a present. Sort of like when you scroll through her blog, it's a real treat!

middle: the card by Say Yes is bright and cheery, just like the site. Three cheers for perfect branding!

right: ok, so Kori Clark not only drew the spot near where I used to live and had my Bat Mitzvah in Rosemary Beach, Florida (is it a small world or what?!) but has the perfect card to showcase her talent as an illustrator and stationery designer. Her card folds fold up, there are 2-sided cards with her beyond adorable drawings inside.

business cards from alt

left: creativity without spending a cent? Crème de la Craft created her cards from cereal boxes, which represents her blog, since it's tagline is "DIY projects made from everyday objects."

middle: Handmade Charlotte's card is chic and simple with a bright back. It's bold and stands out, which totally matches Charlottes playful, sweet and generous personality.

right: sometimes simplicity speaks for itself, as in Brooklyn wedding designer Michelle Edgemont's bold gold leaf foil star.

creative business cards

left: Caravan Shoppe made an interactive rocket. Need we say more from a brand that creates downloadable templates for  you to create fab paper products at home. Branding perfection!

middle: The Cricut Explore cuts, scores, draws and cleans your room. Well, it probably could do the latter since it seems like it can do just about anything. And since a regular shape card turns into an origami-like box that I'm displaying on my desk, I'd say not only is the Cricut Explore a piece of art, so is this business card.

right: So my mom might have a girl crush on Whippy Cake and her adorable retro style and fashion-forward hair, and trust me, you will too when you take a look at her blog. Her card is simple and refreshing… just like her!

really cool business cards

As you might have noticed, I've changed the look of our blog a few times lately and we are pretty close to being finalized with how we like it. Pretty close! Which means, you guessed it, I can start designing our new business cards on Minted. And I have plenty of inspiration thanks to my new friends.

xo ~chloe

Candy Lollipops, Part 2

DIY, EXTRAS, RECIPESKim & Chloe3 Comments

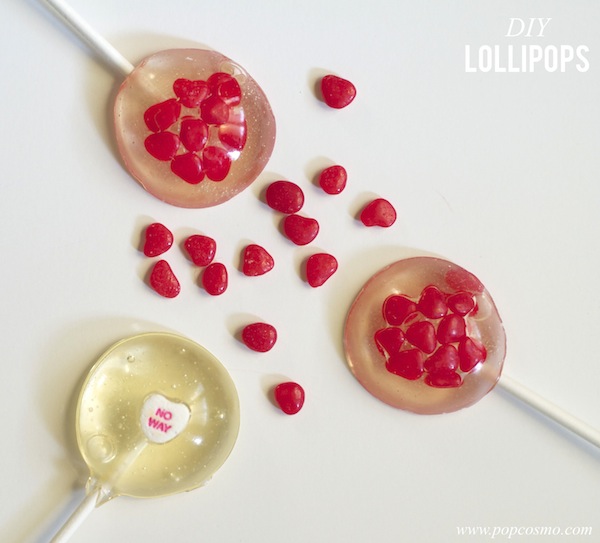
candy lollipops

We're back with more lollipop ideas! We had so much fun making glitter lollipops, that we decided to get even sweeter this time around with candy lollipops. They're easy to make (see the recipe here) and you just add in the candy you like - so we chose red hots and candy hearts for Valentine's Day. This time around we decided to use  candy molds which gave our lollipops the perfect round shape. Our friend, and newbie blogger Christy at The Bourbon Blush {be sure and show her some love} lent us her candy molds, but you can find them here: balloon sucker molds or round sucker molds.

Have fun cooking up a sweet treat and enjoy your candy lollipops!

making candy lollipops


http://popcosmo.com/wp-content/uploads/2014/01/hearts- .jpg

Glitter Lollipops, Part 1

DIY, EXTRAS, RECIPESKim & Chloe22 Comments
DIY-Glitter-Pops-w-pc.jpg

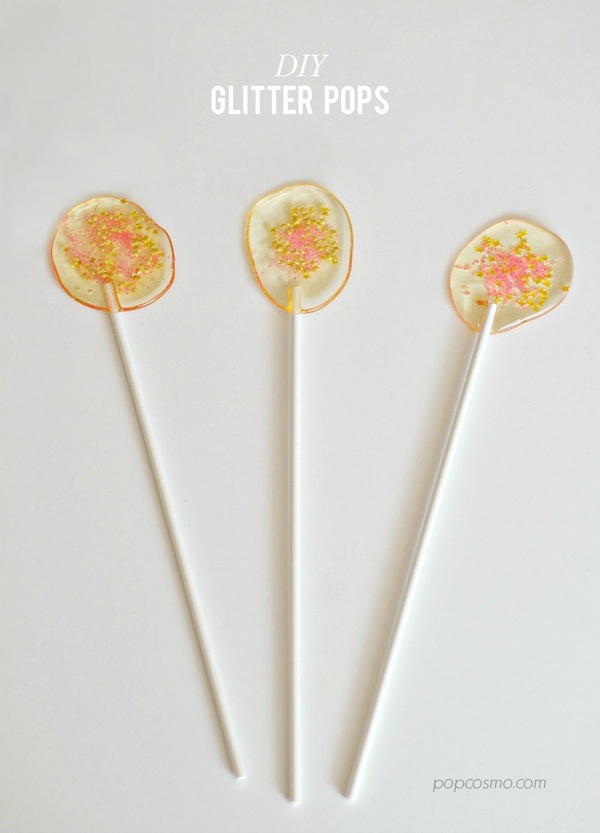
DIY Glitter Pops

As a lover of all things Etsy, all things gold, and anything glittery that doesn't make a mess, it was true love when I discovered Sweet Caroline Confections glitter lollipops. Of course, the first thing that popped in my head was, "I could make those!" Typically, you know the drill, about 50% of our DIYs never make the pages of our blog, but make good stories for Chloe and I to laugh about… later. Once we get over the frustration of having tried to recreate something. But these glitter lollipops are fun and easy to make, and color customizable like our Marshmallow Pops.

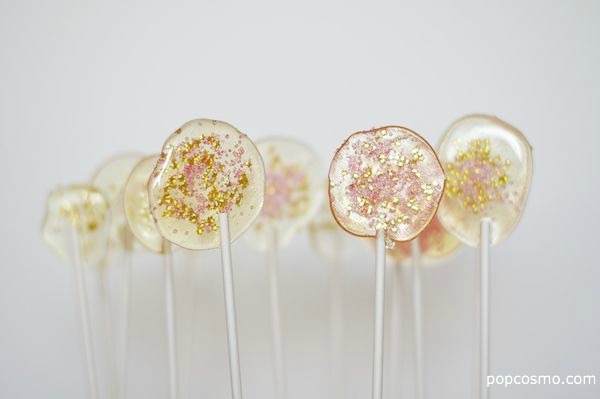
Even if our Glitter Lollipops aren't the perfectly round, clear perfection we saw on Etsy, ours are perfect for Valentine's Day (or just change the glitter color and customize them for any occasion, from weddings to prom parties to baby showers, reveal parties, and bar mitzvahs). The possibilities are endless, which is what we adore about the this glittery confection, besides the fact that it only has a few ingredients and is simple to make once you master the technique of the what I prefer to call the "slow pour."  So let's get started!

Glitter Lollipops

Ingredients:

2 cups white sugar 2/3 cup light Karo corn syrup 1/4 cup water edible glitter of your choice {you will also need lollipop sticks, a candy thermometer, and a bowl partially filled with ice water set aside}

Directions:

1. Prepare your work area since it is important that once your candy has finished cooking you can work quickly:

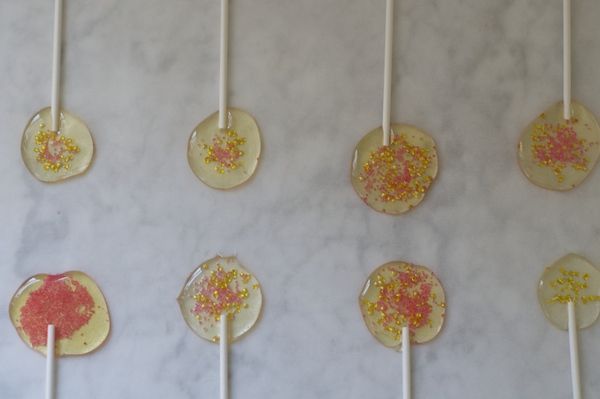
a. If you have granite or marble countertops, lay parchment paper directly on them in long strips. We found this the best method to work quickly. If not, then use cookie sheets lined with parchment paper. (Note: we tried using Silpat, but ended up with a pattern on our lollipops from the sheets. Yours may not make a pattern, so feel free to try it!)

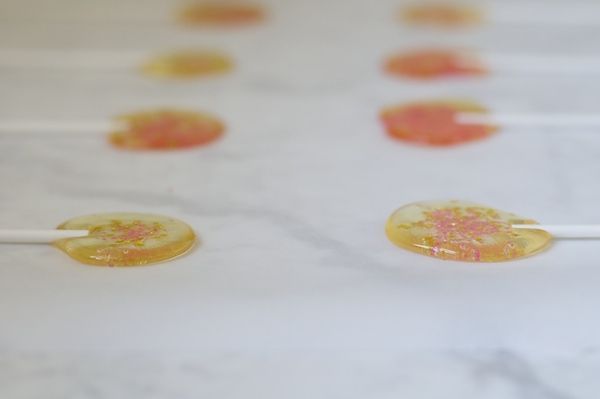
b. Sprinkle your glitter in 3" circles about 3" apart in 2 rows so that lollipop sticks can face in opposite directions and lay completely flat. If you are using candy, then you can place candy into the lollipops after pouring.

2. Place sugar, corn syrup and water in a saucepan with a pouring spout. Stir until the sugar is dissolved while bringing to a boil.

3. Once boiling, place your candy thermometer in the pot and use a pastry brush to wash down the sides so crystals don't form.  Do not stir, but boil until mixture registers 300 degrees to 310 degrees (hard-crack stage) on a candy thermometer, about 5 - 7 minutes.

4. Remove from heat and set in the bowl partially filled with ice water for 15 seconds. It will steam loudly! You want most of the air bubbles to be gone, but don't want the mixture to cool off to much because then it won't pour well - and it cools very quickly!

5. Pour very slowly in the middle of each glitter circle until a circle is formed and press in lollipop sticks. Let sit until completely cooled.

How to Make Glitter Pops - step 5

DIY Glitter Lollipops

Note: I did re-warm the syrup over the lowest heat to soften it slightly when it began to harden. Also, clean-up is easy if you soak everything in very hot soapy water.

Recipe adapted from MarthaStewart.com 

And, if you noticed the title, it says Part 1, so yep, we had so much fun making these, that we'll be back for more ideas after we order a few supplies (hint-hint) for more Glitter Lollipop goodness!

xox, Kim

IF YOU ENJOY THIS: check out our Calligraphy Made Easy & Drink Stirrers


5 Things on Repeat

All, EXTRAS, RANDOM STUFFKim & Chloe7 Comments
videographic.jpg

5 Things Do you ever get the feeling that you just repeat yourself day in and day out? I do. Constantly. Sometimes, I feel as if I could simply record myself  and nobody would even notice I wasn't around. I'm still not sure if Chloe  feels like she repeats herself, and by the time we get halfway through the video we're both completely confused about we're even doing, but at least we had fun (as usual) making 5 Things on Repeat.

Watch for yourself and see what you think. And let us know if you have any phrases on repeat that drive you (or someone else) crazy.


Instagram Loves

EXTRAS, RANDOM STUFFKim & Chloe2 Comments

Best Instagram Accounts

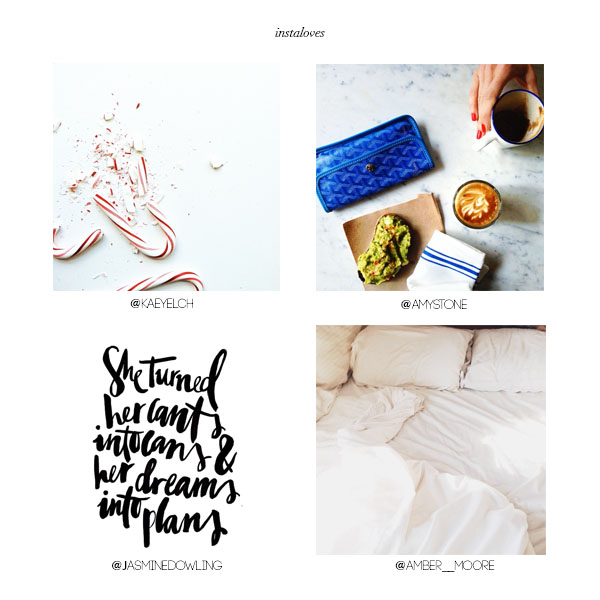
You know those people that you follow on Instagram and always find yourself liking their pictures, commenting on their pictures, and wishing that they would post more? Well, we follow a ton of creative people on Instagram and we thought we would start a little series where we share a few of our favorites! These are people that you must, must follow to gain a little inspiration for the day. Here are our first four favorites, with more to come.

@kaeyelch: Kae is able to make even the most simple things look so elegant. Her pictures are always perfectly crafted, and beautifully minimalistic. Kae is able to zoom in on an object and have it fill the screen without making the whole picture look too overwhelming.

@amy_stone: Every time Amy posts a picture I can’t help but stare at it for a few moments. Her pictures are always a source of inspiration and I love that her entire feed works together with hints of blue and purple tons in every picture. Fabulous photos!

@jasminedowling: I recently stumbled upon Jasmine’s feed and her pictures never cease to add a little sprinkle of happiness into my day! I especially love her amazing calligraphy skills, which y'all know I'm working on if you follow our Instagram.

@amber__moore: Amber’s pictures always have the perfect amount of white space to them so they are so calming and simple. I love the way she is able to make a busy scene look simple with her angles and framing skills.

Share your favorite Instagram loves with us… we'll be sure to check them out!