Popcosmo

diy

Galentines Day

FASHIONKim & Chloe2 Comments
bfe94dd940b3e75d440ca033064ad6fe1.jpg

I've never had a Valentine, but I'm sure if I did I'd spend my day being spoiled with chocolate, roses in every color, and maybe a new piece of jewelry. It would be a day all about me, all about love, and all about, wait, did I already say "me?"I like to think that the reason I've never had a Valentine is because boys are intimidated by me and my good looks, but I think it's probably due to the fact that every time I get close to an attractive boy my brain fails me. I stutter, I blush, I get sweaty arm pits, and so on and so forth. I just don't have the ability to be smooth around attractive boys. It's my only* fault in life. *sarcasm

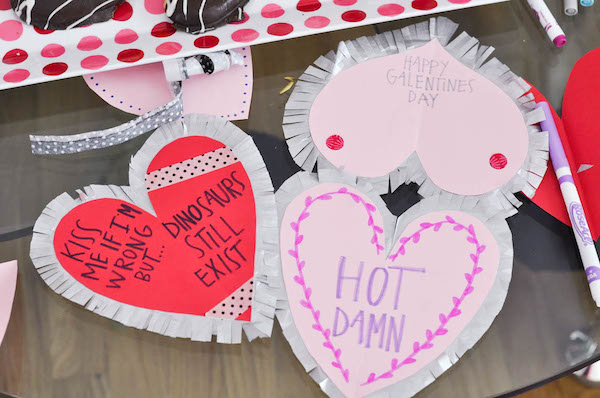
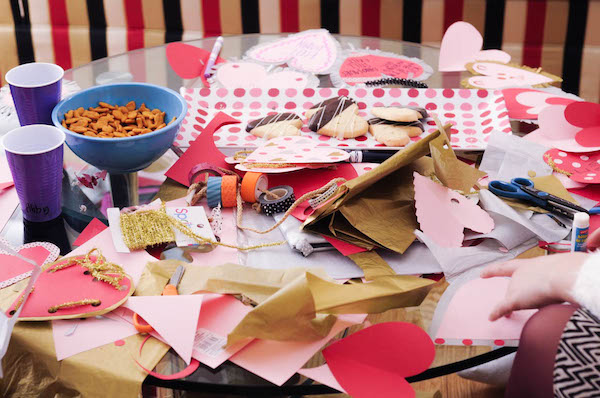
With Valentines Day right around the corner, yet a lack of an actual Valentine, I decided to host a little Galentines party (based on my favorite TV show, Parks and Recreation) with a few of my friends. We decided to make Valentines Day cards for our non-existant boyfriends, eat food (aka Costco cookies and Goldfish), and laugh at our inability to make eye contact with cute boys. Overall, it was a successful day and we had a lot of fun. If you don’t have a Valentines date, or even if you do, I highly suggest getting together with a bunch of girl friends and having a craft party. A little creativity is always fun and makes for good memories! I decided that I'd compile a list of a few cute Galentines Day crafts so that you can jumpstart your party hosting... you're welcome in advance. DIY heart pillow. Perfect for dreaming about holding a conversation with a cute boy. DIY watercolor heart cookies. Because food is a perfectly fine substation for a boyfriend. Food>Boys DIY Piñata love gram.  A great craft to make with a group of friends!

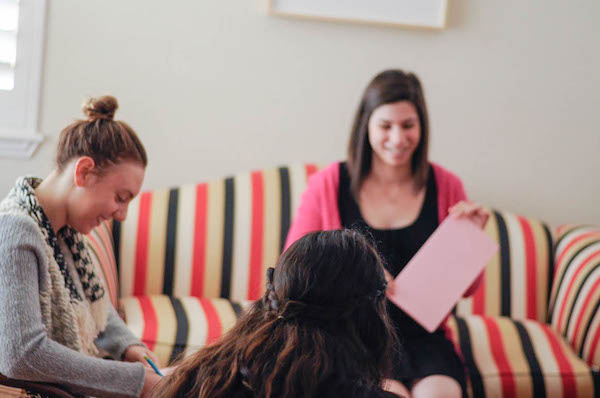
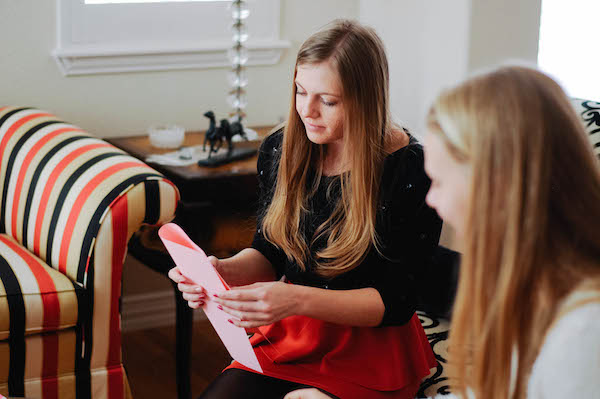
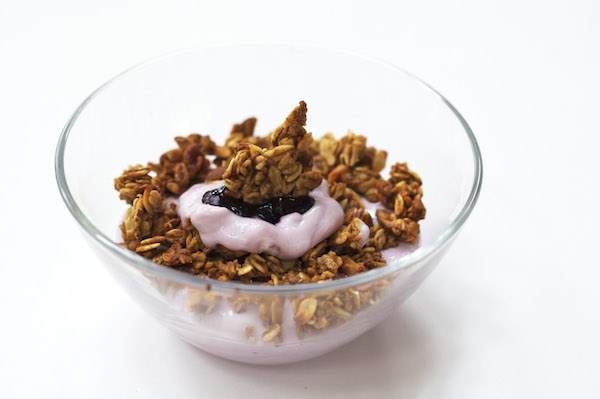
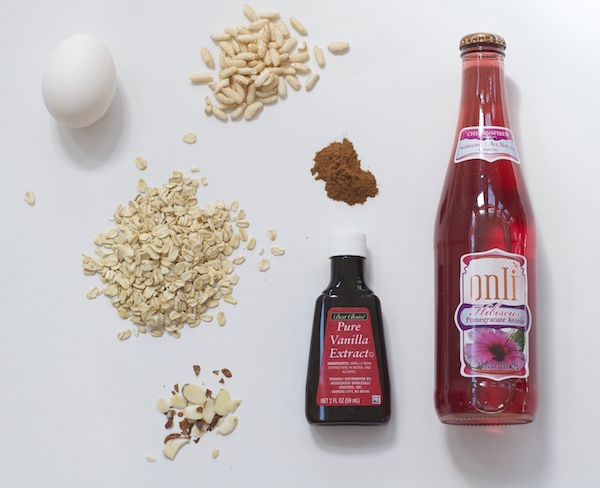
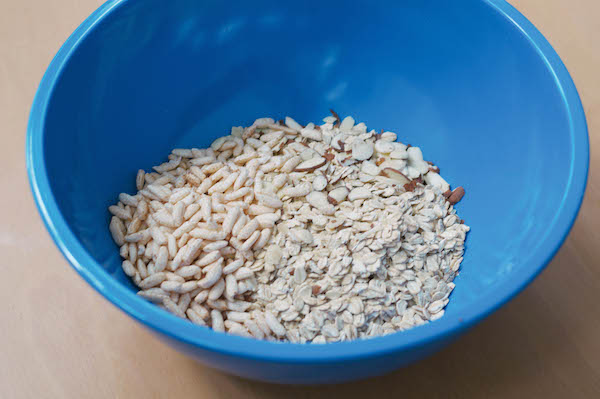
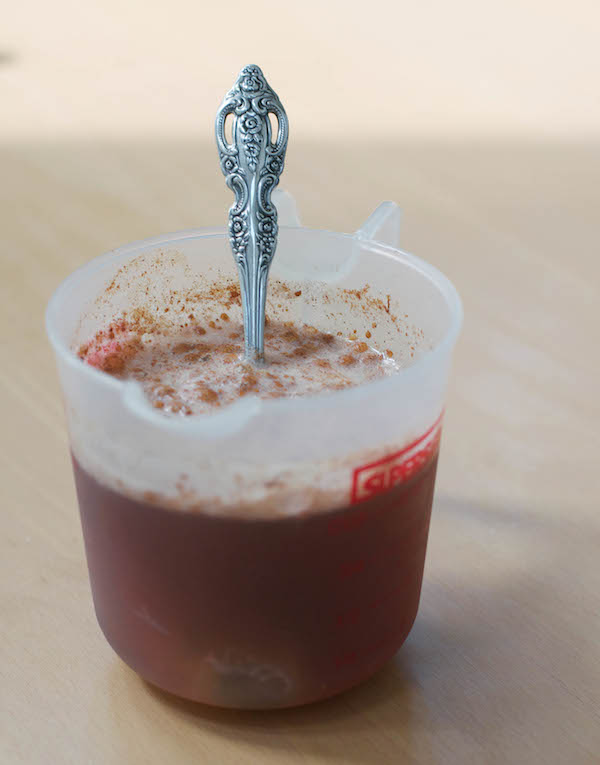
Here are a few pictures from our little party:

_DSC0012-2 edit3 edit2 edit _DSC0006-2 edit1 _DSC0021

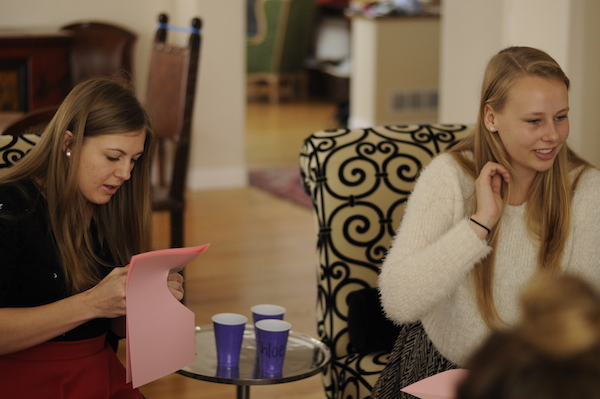
I hope you have a LOVEly Valentines day, especially if no boys are involved ;) xox Chloe

Energy Bites

DIY, EXTRAS, RECIPESKim & Chloe2 Comments

So, before I get into the real post, I just want to mention that a ton of people found out about my blog at school. It seemed like all of a sudden people were mentioning that they liked my blog or had seen my blog, and it was kind of weird at first. It’s not that I didn’t want people at school to know that I have an “internet life,” it’s just that it felt kind of separate. I’m not any different on my blog than I am in real life, but I do think of my blogging self as a whole different part of me. Anyway, I guess what I’m trying to say is that if you have a hobby or extracurricular activity that you’re passionate about, don’t worry if people find out about it. It’s who you are and it’s a part of you, regardless of what other people think about it. And, if you happen to be from school and you’re reading this… lemme know (;Ok, sorry, moving on to the real post now...

One of my friends from school brought some peanut butter balls to swim practice and she let me have one. Not only was it absolutely amazingly tasty, but it was the perfect snack to have right before a workout. She told me that she found the recipe on Pinterest so I did some digging and found it myself. I didn’t have all of the ingredients on hand so I kind of changed it around a little bit and I happened to really like the way they turned out! Here’s what I did, but if you want the real recipe to make these energy bites, click here.

ingredients - energy bites no bake | energy bites No Bake Energy Balls energy bites

Ingredients:

1 cup of dry oatmeal (old-fashioned oats) 3/4 peanut butter (I tried almond butter, but it wasn’t sticky enough) 1/2 cup chocolate chips 1/3 cup honey 2 table spoons chia seeds 1 teaspoon vanilla extract

Directions:

1. Pour everything in a bowl and mix it together. I found that using my hands to mix was much easer than using a spoon or whisk. 2. Put the mixed bowl into the fridge for at least half an hour 3. Roll into balls about 1” in diameter (or however big/small you want them)

Seriously, that’s it. These energy bites are so simple to make and so easy too! If you make them be sure to post a picture on Instagram or Twitter and tag us so I can see!

xox, Chloe

Free Binder Covers

DIY, EXTRAS, RANDOM STUFFKim & Chloe11 Comments

Well, I promised that there would be new free binder covers out soon, and I’ve kept the promise by following up with more cute binder covers. I decided to keep it preppy with the color combos + stripes, because I think a lot of you will really like them… I know I love ‘em. We truly think that cute school supplies can make an entire school year more bearable, so we've got you covered when it comes to amping up the cuteness factor of those ugly and plain binders. But. they work for anything -- in fact, my mom is even using them around the house for things like take-out menus and papers for me and my brother. Hope you like this new design as much as the first set. Free binder covers for the win!

Also, if you use them be sure to post a picture on Twitter or Instagram and tag us @popcosmo and we will totes love you forever and ever. ;)

back to school and office supply binder cover templates
DIY binder covers
DIY binder covers
free downloadable binder insert | takeout menus
DIY binder covers for school and home


So all you need to do is drag and drop the image and place it on your desktop. Then open it in Word or Photoshop and add the text you would like! 

Thanks for reading!

xox Chloe

DIY Graphic Tee

DIY, FASHIONKim & Chloe6 Comments

What's one item I could wear with everything? A graphic tee... every time I walk into J.Crew I want another one! But they are breaking the bank, so I turned to my trusty Cricut Explore, which had been getting dusty while we moved and I was away this summer. It's definitely time to start playing with it again since it is so versatile and makes the most complicated craft ridiculously easy! The best part? That's my handwriting. Mhmm. I officially have the coolest shirt around town - my own DIY graphic tee. diy graphic tee

tee: Gap | necklace: Ela Design Studio | sunnies: Ray-Ban

Supplies: T-shirt Cricut Iron-on Cricut Iron Ironing board Tea Towel or t-shirt

Feel free to use our .png file below! Then we can be twinsies with the same shirt ;) blah

Directions: 1. Cut Cricut Iron-On a little larger than the words you are printing and place it shiny side down on mat. Load into the Cricut and follow directions. 2. Be sure to check the box for "Iron On" so that your words will be backward. (This will make sure that when you actually iron on it will be in the right direction) 3. Peel the extra Iron-On material off of the transfer sheet and make sure that no little "extras" are still on your design. 4. Center the design on your shirt and iron onto shirt with a tea towel in between the iron and the Iron-On material. 5. Sit back and admire... then wear what's sure to become your DIY favorite graphic tee and rake in the compliments.

blahblahgraphic diy shirtblahblahshirt

Disclosure:  We are members of the Cricut Blogger Network and received product in exchange for review but as usual all opinions are 100% our own. 

Homemade Hibiscus Pomegranate Granola

EXTRAS, RECIPESKim & Chloe7 Comments

Onli Homemade Granola As you might have noticed, we’ve been posting a lot of recipes lately! I don’t know if it’s just that we have a better kitchen in our new house in Denver, or if I’ve just been enjoying making my own food over going out. Whatever it is, I’m loving it. Onli Beverages was nice enough to send me a few drinks to try out and I decided to get creative with it. With my cousin Aly visiting, we made Onli flavored granola. Seriously? Yes, and this homemade granola is beyond delicious.

Ingredients:

2 1/2 cups of oats 1 cup puffed rice 1/4 cup sliced almonds (or other nuts) 6-8 ounces of Onli Hibiscus Pomegranate Aronia 1 egg white 1/2 teaspoon vanilla extract 1-1/2 teaspoons cinnamon 2 tablespoons honey (add more for sweeter granola) 1/4 teaspoon salt

Directions:

Preheat your oven to 350 degrees. Mix the oats, puffed rice, and almonds in a bowl. Mix everything else in another bowl. Then combine the two bowls into one. Stir it all until the liquid is absorbed. (You might need to add more oats or puffed rice to help) Lay all the granola on a cookie sheet covered with parchment paper. Put your granola in the oven for 15 minutes, then stir and put it back in for another 15 minutes. (If you want it to be super crunchy, then you can put it in for longer).

Homemade Granola Ingredients Homemade Granola Homemade Granola | PopCosmo   Granola Recipe granola how to make granola | PopCosmo

This should make a batch for about three people so feel free to double or triple the recipe. We ate ours over yogurt and we've learned that we need to keep a constant supply on hand. Onli has a ton of flavors so we definitely want to experiment with the rest of them! If you try this recipe out be sure to tag us (@popcosmo) and @ONLIbeverages in the picture! We might be biased, but we think it's the best homemade granola you'll ever eat!

xox, Chloe

Try this T-shirt Tie Dye

DIY, FASHIONKim & Chloe26 Comments
striped-tie-dye.jpeg

One of our favorite summer projects is tie-dying and as much as we love tie-dye, you know we like to keep it simple... which is why we are such huge fans of Tulip One-Step Tie-Dyes and have been using them for years for all of our projects (see tie-dye shorts and tie-dye beach sheet). We were ready to jump on the Tie Dye Your Summer bandwagon and once again turned to Tulip because they come with bottles that you simply fill with water and you're ready to go. Even gloves come in the box, plus some ideas. All you need is something to tie-dye and a cool idea! t-shirt tie-dye

Striped T-Shirt Tie Dye Prep cool tie-dye patterns 1. lay t-shirt flat and get rid of wrinkles 2. pleat the shirt from top to bottom (you can fold it in the middle if it's easier to handle it) 3. fold sleeves in last, pleating them as well, and tucking them under 4. you should have a flat pleated shirt 5. wrap rubber bands around at intervals, making sure the pleats stay intact 6. your t-shirt should look like a centipede when ready to tie-dye

Dotty T-Shirt Tie Dye Prep Spotted Tie-Dye 1. lay t-shirt flat 2. pinch sections of the t-shirt and wrap the rubber band tightly around. The larger the piece sticking out the top, the larger your circles will be and the more rubber bands you use, the bigger your white space around the circle will be. You could pinch both front and back, but we pinched the front and back together (i.e., the back of the shirt was in the rubber bands you see) and it looked fantastic while saved a bunch of steps.

Once you have your shirt(s) ready, wet them thoroughly. You could definitely do this step first, but we found it was easier to work with dry shirts. tie-dye steps

Gather the tie-dye supplies  - most of which will be in your Tulip One-Step Tie-dye kit + protection for whatever area you will be tie-dying in. We suggest tie-dying in the grass, if you can, since the area will be stained. Tulip tie-dye supplies

Add water to the color bottles you choose and you are ready to tie-dye! It couldn't be more simple, then add color to your shirts directly from the bottle.

tie-dying steps

Once the color has been applied, place them in a bag for 6 or more hours (we left ours in the bag overnight) because we're lazy like that. steps to tie-dye

Remove the shirts from the bags and rinse them in cold water until the water runs clear. It takes a while, but once the color is out, it's gone and your tee is colorfast. Follow the instructions for washing and drying and then enjoy your new shirts. how to make a striped tie-dyehow to make a spotted tie-dye

Voilà, one old tee that was stained turned into a new tee that looks amazingly cool and a new tee that looks much better than plain white! We might cut the neckline on the blue tie-dye t-shirt, but we really love how it turned out.

Follow I Love To Create for some fab & fun creative inspiration on Facebook, Twitter, Pinterest and their Blog. Perfect boredom busters! Get creating!

What are you thinking about tie-dying?

xo ~kim & chloe

 Thank you ILTC and Blueprint Social for sponsoring this post. All opinions are our own, as usual! 

Avocado Toast Recipe

EXTRAS, RECIPESKim & Chloe17 Comments

I definitely wouldn’t consider myself  “trendy” in fashion, but when it comes to food that’s a whole different story. I like trendy food. It’s always fun and most of the time it tastes good and that’s all I can ask for when it comes to what I eat. When I was in New York City the hottest food was (is?) avocado toast. It was on every menu and popped up on my Instagram feed more times than I can count. My cousins and I decided to make it one weekend and I swear we ate so much of it that we weren’t hungry until the next day. It was that good. Actually, it was that amazing. Delicious, impeccable, flawless, etc. avocado toast recipe Avocado toast is a little bit of heaven spread on a piece of bread.

And here’s the perfect avocado toast recipe:

  • Slice two avocados and mash them in a bowl (we liked ours a little chunky but mash until you like the consistency).
  • Immediately add lime juice to your mashed ‘cado. This makes it taste amazing and keeps it from turning brown and gross.
  • Add salt, pepper, and red chili flakes to taste.
  • Toast a piece of bread (we used our gorgeous, fast, and no more "knife to get the bread out" Magimix toaster) -- I <3 my toaster. Seriously.)
  • Spread the ‘cado mixture on a piece of toast and add more chili flakes to the top

And there ya have it. Five simple steps to make the best toast ever. Avocado toast recipe

how to make avodaco toast Clear Magimix Toaster

Magimix Toaster

Life is better with clear toasters. I mean seriously, how cool is this Magimix toaster?!avocado toast

Let us know if you recreate this avocado toast recipe, and we’d love to see your pictures! Tag us on social media (@popcosmo)! xox Chloe

Free Downloadable Binder Covers

DIY, EXTRAS, RANDOM STUFFKim & Chloe7 Comments
socialstudies.jpg

One of our all time most popular posts is our “Decorating Notebooks” post from a year ago. We thought that, since it’s still crazy popular, we should bring it back with better and bolder designs. I decided to create free downloadable binder covers for y’all and I hope you love them as much as I do. I can’t wait to use them this year for school! I’m planning on hopefully coming up with other designs, so if you aren’t head over heels with this set then be on the look out for different styles! Here’s how to create your own: 1.Click the link that says "download" and then download the "blank canvases” to your desktop 2.Upload them into Word, Pages, Photoshop, etc. 3.Use your favorite font to write your class name on the white part of the cover. (I used Antonio from Font Squirrel!) 4. Print!

free downloadable binder cover click here to download pink + blue + navy binder cover

binder cover free download click here to download pink + blue + yellow binder cover

binder cover downloadable click here to download pink + pink + pink binder cover

Really! It’s that simple. Let me know what other patterns and color combos you would like to see… polka dots? watercolor inspired stripes? pink and green? yellow and mint green?

If you do happen to use these free downloadable binder covers, we’d love to see how they look! Tag us on Instagram or Twitter (@popcosmo) and you just might be featured on a blog post!

xox Chloe

Aesthetic Phases / 1

EXTRAS, RANDOM STUFFKim & Chloe5 Comments
bananas.jpg

I don’t know if I’m the only one who goes through aesthetic phases, but I surely can’t be, right? If you follow us on Pinterest (you better be) then you might notice how every few weeks our “mood” shifts. It’s not a dramatic "tectonic plate inducing earthquake" shift, it’s more of a “let’s switch one or two pillows on the couch and see the difference” shift. I guess that’s why I’m not really a “fashion person” (sue me). I like being able to switch it up on a moments notice, so that’s why  I stick to more basic and simple clothes. Anyway, all I’m trying to say is that what I like and the aesthetics that I like are constantly shifting and changing. I decided to create this little mini series thing where I would create a mood board of my current likes. I have absolutely no idea how often (if at all) I will be posting these mood boards, but as Miley Cyrus once said “it’s my blog I can do what I want to.” Err, at least I think she said something along those lines…

aesthetic phases / 1 photo / photo / photo / photo / photo / photo / photo / photo / photo / photo /photo / photo / photo  This mood board doesn't really have a name, but if I had to choose one I think it would be along the lines of "Jen Gotch is my girl crush" or "this is what feminism looks like to me" or "pink is cute and strong" or "this mood board may be better off nameless."

Thanks for reading! Let me know what you think of this idea for a series! xox Chloe

How To Style Pictures On A White Background

BLOG TIPS, EXTRAS, RANDOM STUFFKim & Chloe33 Comments

I’ve been getting a few emails recently asking how I take styled pictures on a stark white background. White backgrounds, for a blogger, are so important in showing items. The white allows the items to “pop” off the screen. White backgrounds as so important. The only problem is that sometimes the white isn’t so white. Often times the white turns out more on the yellow or grey side. And it can be VERY annoying. changing backgrounds in photos to white Today I’m going to save the day and tell you how I take my pictures on a white background so the white turns out white.

1. I use a white poster board as a background. They are cheap, moveable, and perfect for the job. 2. I then place my poster board near a window and turn off all lights. Natural light is the only way to go. Sometimes I have to wait until the next day to take pictures if I run out of time. It’s worth the wait to have natural light, trust me. 3. I shoot my camera on manual mode. This means that I can pick how exposed I want my picture. I typically overexpose my pictures on white backgrounds so that the white will be brighter. Sometimes overexposing doesn’t work (if you’re shooting a white or light colored object) so you just have to play around with it! 4. Once I am finally happy with a picture (sometimes it takes 100 shots of the same exact scene just with different angles) I upload the pictures on my computer. I then pick the one that looks best at first, aka minimal editing. 5. I then upload the picture in Photoshop and work around with it. I ALWAYS fix the “levels,” so that’s my starting point. I then also play around with the brightness and exposure. It usually depends on the picture for the amount you choose to apply of each. It’s like makeup ladies, the amount depends on the occasion.

_DSC0026_DSC0017whitefruitBEFORE

the before

This is for "levels" in Photoshop. ARROW

LEVELS sometimes you just gotta place a poster board in the middle of your kitchen to get the best light (even if it makes your dad mad because "you have an entire basement and and an office to do your work")

white background after

the after!

So there you have it! It’s pretty simple, but it did take me forever to figure it out. Taking styled pictures on a white background isn't always a piece of cake, but once you learn the process and practice you'll figure it out! Sometimes I just can’t get it so I start the whole process over with different natural light. I swear, the amount of natural light (or time of day) can completely screw you over or help you out.

Please let me know if this helped you out! I’d love to see your white background photos so tag us in your photo on social media (@popcosmo).

xox, Chloe

@popcosmo on Instagram

Chocolate Bark Recipe

EXTRAS, RECIPESKim & Chloe9 Comments
COVERPHOTO.jpg

I have this problem where I want to be healthy when it comes to food, but then I see chocolate and I eat it. It’s like my brain doesn’t work with me. But who am I kidding, chocolate is worth it. And this chocolate bark recipe? Yeah, it’s more than worth it. My brother and I always cook when we are bored and we decided to create our own chocolate bark combinations earlier this week after seeing some drool worthy combinations in the chocolate aisle of our grocery store. We had some crazy ideas in mind (think seaweed) but we decided to keep the combinations rather simple. And they’re all beyond amazing I might add.Here are the combinations we went for, but you can seriously add anything you want. That’s the beauty of this recipe. -Croissant Crumbs (try saying that in a French accent) -Peanuts and Banana Chips (Chocolate Chimp) -Popcorn (kettle corn would also be amazing) -Banana and Coconut (a tropical sweet) -Potato Chips (the perfect salty + sweet combo)

DIY Chocolate Bark

DIY chocolate bark ingredients


bananacoconut

banana peanut chocolate bark

potato chip bark

croissant chocolate bark


popcorn chocolate bark

Here’s what you do. It’s painfully easy.

  1. Melt a whole bunch of chocolate chips. We melted ours over a pot of boiling water so that we could make sure they didn't burn.
  2. Cover a cookie sheet with wax paper and then pour your melted chocolate onto the baking sheet.
  3. Evenly spread all your chocolate.
  4. Add toppings as desired. We placed ours in strips but you can create any pattern you want.
  5. Stick your chocolate in the fridge until it’s hard.
  6. EAT. (the best part)

I’d say the whole process takes about 30 minutes (not including the chocolate drying in the fridge.) It’s easy and delicious. A killer combo in my book.

If you make chocolate bark then we want to see! Tag us in any pictures that you post (@popcosmo).


xox, Chloe

DIY Diamond Pinata

DIYKim & Chloe8 Comments
final1-3.jpg

DIY Diamond Piñata We are so excited about our DIY Diamond Piñata that we created. Although we always say our latest DIY is our favorite, we really think this one is since it's big, shiny, packs a statement, is shaped like a diamond, and... can be filled with candy. What more in life could you need than an enormous candy-filled diamond piñata? We happen to like our diamond pinata just for decoration in our office, but the possibilities are endless: cinco de mayo, wedding showers, weddings, bachelorette parties, sweet 16....

And who says a piñata has to be filled with candy?? Why not confetti or tiaras? Dream big, we say, dream big.

Our guest post on Best Friends for Frosting has the directions for our DIY Diamond Piñata. Go check it out!


Milk & Cookie Shot Recipe

DIY, EXTRAS, RECIPESKim & Chloe7 Comments
diycookieshots.jpg

The rage with cronuts by Dominique Ansel's Bakery are are being followed up by his hugely popular milk and cookie shot. Recreating his cookie shot is right up there at the top of our list of favorite recipe posts (along with how to make glitter lollipops and the best cake pops) we've brought y'all, because somebody (us!) had to taste test every single chocolate chip shot to make sure it was up to par. And we now have a signature dessert to bring to book club, Kentucky Derby parties, wedding showers, well… just about any party. And clean up is a snap: just down the milk and eat the shot glass. Couldn't be easier. Although there are a variety of recipes we tested, we're sharing our winner: the most simple one that didn't leak and didn't involve an extra layer of glaze to seal the cookie. (But there are glazes below.)

DIY Milk & Cookie Shots

Ingredients: chocolate chip cookie mix mini popover pan tinfoil corks shot glass flour milk

ingredients for cookie shots

Directions: Follow the directions of your cookie mix or use your own chocolate chip cookie recipe. However, add flour to your mix after you have completely mixed yours together. We added between 1/4 - 1/2 cup to ours in order to create a dense cookie mix. Then mix in the flour.

cookie mix for cookie shots

Roll out some of the dough about 1/4" thick and use the shot glass to cut circles. Place the circles on the bottom of each popover mold.

cut circles for cookie shots

Take pieces of dough and roll into a ball, then a log shape, then flatten and place in a the popover mold being certain to attach it to the circle on the bottom so that no milk will leak through the seam. You'll see that our cookie shots are rather thick. This is intentional! They are thick and dense (and yummy!) and why no glaze is required.

rolling dough

Take your cork and roll it in tinfoil, then place it in the center of each cookie shot. This will prevent the cookie shot from falling into the center.

corks for cookie shots

Bake until brown, or like us - the maximum time suggested, and let cool.

chocolate chip cookie shot

If you would rather have a thinner "shot" wall, then you might need a glaze. Whichever you choose, be sure to coat the inside of the "shot" well so that there are no cracks and pour off any excess. You can use:

  • dark chocolate and melt it. Pour and coat bottom and sides, then chill.
  • magic shell for ice cream. Coat all sides and bottom, let harden
  • confectioner's glaze: a little bit of confectioner's sugar + a small amount milk + vanilla. It should have the consistency of thick paint. Paint it on the inside with a clean paintbrush. Chill overnight, then bake for 5 minutes (so you might want to initially bake your shot for the minimum amount of time or until just barely brown).

Add milk (or kahlua or...) and enjoy!

FYI:  we let our chocolate chip cookie shot hold milk for 4 hours in the refrigerator for the sake of testing. We couldn't wait any longer in our taste testing gorge-fest to see how long these would last. They were far and away the best cookie shot glass recipe we made: no leaks, fabulous consistency & no need for a glaze. Plus, we realized that if the milk sits a while, it makes them taste like chocolate chip cookie cake. Yum.

Enjoy and let us know how your shots taste!

Cupcake Toppers

DIY, EXTRAS, RECIPESKim & Chloe7 Comments
cupcake-toppers-copy.jpg

cupcake toppers Cupcakes are the cutest of desserts: a mini cake that you don’t have to share. Because when it comes to dessert, sharing isn’t fun, it’s stealing. One thing I love seeing lately are cake toppers. They are such a cute way to add a little extra something special to a cake. A cherry on top, if you will.

However, I haven’t really been seeing anything that goes on top of cupcakes. I mean there are those cheap plastic rings that grocery stores put on top of their cupcakes, but those don’t really count. So I thought to myself, “wouldn’t it be fun to make a little something for the top of cupcakes.” And because this thought seemed rather rational compared to my other ones (ie “is a banana still edible if you spray paint the outer peel and then eat the inside?” or “if the sun was black would the sky be black or just a darker blue?”) I decided that I should make a few cupcake toppers!

cupcake topper DIY

The star is a classic shape, & when you make the star gold you can channel your inner Rachel Berry, from Glee, because she puts a gold star on everything she likes. Plus, I’m assuming she likes cupcakes, so we’re actually just helping the Rachel Berry cause. I also thought we could get more intricate and make a trendy leaf heart shape.

And aren’t these cupcakes just absolutely gorgeous? We partnered on this post with our fab friend Hunter, of Vivian & Me, who writes a blog about allergy-friendly food recipes. I can not wait to try out these insanely gorgeous basil infused pink grapefruit cupcakes that have a vegan buttercream frosting and candied grapefruit on top! So be sure to stop by her blog for the cupcake recipe &  more amazing, mouthwatering, insanely yummy recipes (buffalo chicken dip, anyone?). And tell her we said "hi!"

Grapefruit-Cupcakes

Directions for toppers:

With the brand new, awesome Cricut Explore (it's on sale right now!): 1. Insert a picture of a star to your Cricut Design Space (we drew our own in Photoshop so it would look kind of rustic and imperfect). If you would like to create our heart & leaf shape, we’ve attached the file below so that you can upload it to your Design Space 2. Print it out on your paper of choice - of course we chose glittery gold! 3. Hot glue the shape to a toothpick 4. Let it dry 5. Then decorate your cupcake until it looks like a masterpiece - maybe Hunter at Vivian & Me has some tips on piping icing that we'll share soon ;)

xo ~chloe

Cricut leaf heart


cupcake topper

DIY Camera Lens Cap

DIYKim & Chloe3 Comments
Donut-Camera2.jpg

We've made camera straps, but I've never touched my camera when it comes to DIY. Seriously, how could you DIY your camera? Well, I found a way (you knew I would) with a DIY lens cap. I think these would even make my brother smile and say cheese instead of making his usual silly face. DIY Donut Camera Lens Cap

Supplies: Snap on lens Cap* Cricut vinyl (Happy note: Cricut vinyl is on sale through 3/4!) Cricut transfer tape (for "say cheese") Cricut Explore *We ordered a plain lens caps here. To determine what size you need you can find it by looking on your lens for the symbol Ø with a number next to it. This number is the size in millimeters of your filter threads, which is the size cap you need. This marking typically appears either on the rim of the front of your lens, or on the side of your lense barrel.

Instructions:

If you’re using a Cricut Explore, use Cricut vinyl to create the camera lens caps. Directions are below.  Otherwise, you could use an Exacto knife or punches to cut out the shapes that you want to create.

1. Open up Cricut Design Space and click “New Project” 2. Then click “insert images” 3. Search “donut” and find one that you like! (We used the donut part of Studio DIY’s and created our own frosting.) 4. Then click “insert image” 5. After it’s on your canvas, highlight the image and look at the bottom of your layers palate and click “ungroup.” 6. Then delete the frosting layer. (This is what we did, but feel free to leave all of Studio DIY's donut - hers is so cute, but we had created our idea before hers was available, and then printed the day it became available, so we wanted to use part of hers and ours to see how it looked! Of course hers is amazing!) 7. Next click “upload image” and then find your frosting layer. We simply drew our sprinkles on with Sharpies since they would have been tiny little dots! Here's our file you can upload.

donut lens cap 8. Next, measure the size of your lens cap and make your donut and frosting that size. 9. Then click the “Go” button and follow your on screen instructions.

Camera Lens Cap

To create the "Say Cheese" you would find a picture in Step 3 of cheese or cheese pizza or whatever cheese-y. Then use text and transfer tape to print & apply the words "Say Cheese."

It’s as simple as that! And the results are fun and different, and just might make someone smile. If you make one of these camera lens caps (or your own version), be sure to tweet or Instagram us a picture. We’d love to see your creations.

xo ~chloe


DIY Jewelry Tray

DIYKim & Chloe19 Comments
TRINKETS.jpg

Like mother, like daughter: we tend to wear the same jewelry day in and day out. Occasionally, we'll change it up for a big occasion. But we both are a bit careless when we take our jewelry off at night, I set it my bathroom and Chloe sets her jewelry on her nightstand, both of us always with the thought of "I hope I don't accidentally knock anything off." This cute little tray solves our problem and we'll definitely be a few others and placing them around the house, like near the sink when I want to take off my rings. It would also make a fabulous customized gift. Supplies: 1-Modge Podge Rocks Peel & Stick Stencil (We were sent this stencil & loved it, but there are 6 adorable designs) 2-Modge Podge 3-pouncer 4-glitter (we used this glitter tube and since nobody loves a glitter mess - this was the perfect solution to direct where glitter went!) 5-Cricut vinyl & transfer tape 6-Cricut tool to peel vinyl 7-small tray

Supplies

Directions: Apply Modge Podge Rocks Peel & Stick where you want your design to be.

Apply Stencil

Use your pouncer to place Modge Podge over only the area of the design where you want the glitter to be located.

apply modge podge

Lift the stencil and squeeze and direct glitter onto the area which has Modge Podge. Chloe and I love the glitter look, yet detest glitter clean-up. This was absolutely far and away the cleanest glitter project we have ever created! There just might be more glitter in our future, thanks to Amy at Modge Podge Rocks!!!

apply glitter

Repeat on the other side of the tray, or continue the pattern on all 4 sides. Once you have finished modge-podging all sides, place the stencil on the backing and rinse so that it can be re-used. Not only does Modge Podge rock, these stencils do too - they held the curved shape of our tray just fine.

jewelry tray

We then applied the Cricut vinyl (oh yeah, expect TONS more about our Cricut Explore to come very soon -we are experimenting right now, but will have loads and loads of projects for you in the near future!) for a simple, yet very effective jewelry tray and trinket tray. You could also apply a coat of Modge Podge over the glitter border to keep the glitter from flaking.

DIY jewelry tray

And that's it! No more searching for a ring here, and earring there anymore. You have all your jewelry in one place with our DIY jewelry tray. Hope you enjoy! xox ~kim & chloe


Disco Love Sign

DIYKim & Chloe39 Comments
diylovesignwithgraphic-copy.jpeg

DIY Disco Sequin Love Sign | popcosmo.com
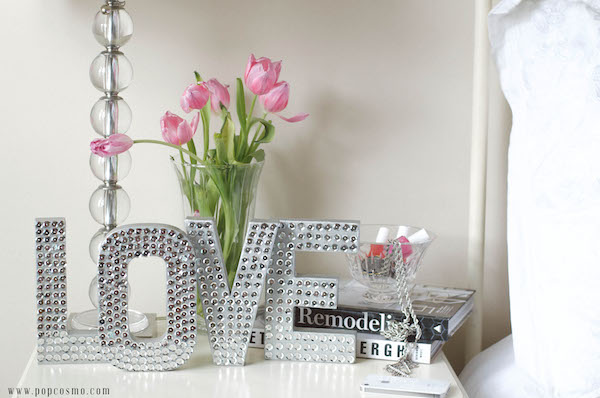
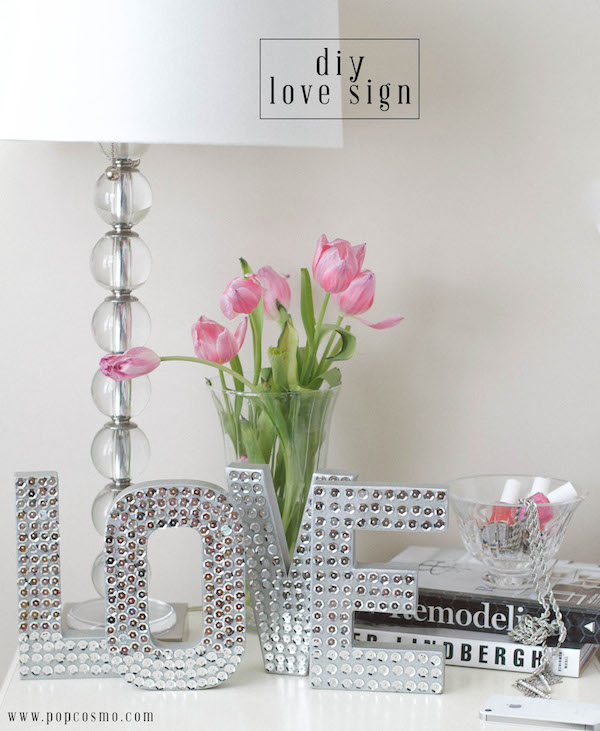
We just can't get enough of love… and since love is all you need (as the song goes) we're going a little crazy with our love signs. Plus, these silver sequins were just calling my name. Since y'all have been trying out the
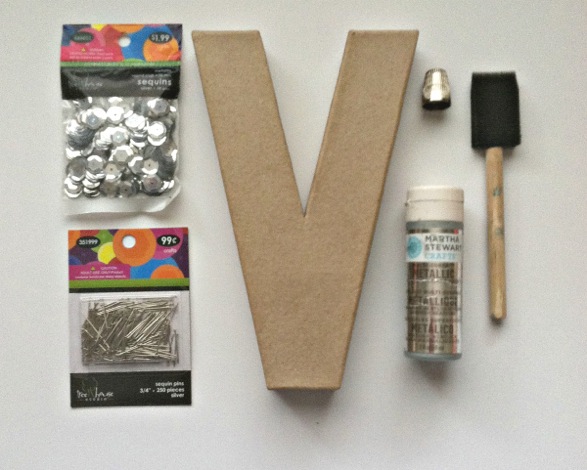
 gold love sign, we decided why not give another love sign a try, but give our fingers a rest and make it easier? The result is just as spectacular and totally reminded me of a disco ball (the effect is something you have to see - it's hard to photograph how fun these letters are!), the directions just as simple, and your fingers will be happy that we don't use wood with this sign. Yes, it still takes some time to make, but I just caught up (once again) on tv shows. Win/win for crafting and a Downton Abbey weekend! Supplies:

Love Sign

sequins - choose any color you like sequin pins - I had to return others - these worked the best thimble - used to push the pin into the cardboard. It's easy, but you'll definitely need one! cardboard letters - I used 8" size brush & paint in same color as sequins

DIY Love Sign | Popcosmo.com

Directions:

1. Paint your letters and let dry. 2. Pin sequins on letters. Space them as close together or as far apart as you would like for the effect you desire. Obviously, the closer together, the longer it will take. Note that the sequins on our L are closer together than the sequins on our E to give you an idea.

That's really it! Like I said, this is a VERY simple project, but a little tedious. To make it easier, I placed my sequins in a cup, my pins and thimble in another cup, and put them both on a tray with my letters to carry from room to room. I finished over the weekend and it was a project I picked up whenever I sat down to watch tv, whether on the couch or in bed. Each letter took about 45 minutes with lots of interruptions. Enjoy, and let us know how it goes!

xo ~kim

Calligraphy made easy

DIY, EXTRAS, RANDOM STUFFKim & Chloe10 Comments
learn.jpg

Learn Calligraphy online

In my childhood, I used to get these strong thoughts in my head about how talented I would be at something. I had this vision in my head of me becoming the next famous softball player, scrabble player, or baton twirler and begged my parents for lessons or to join a local team. My parents knew that these things probably wouldn't be my cup of tea and that I might embarrass myself in the process, but they let me take lessons and learn my lesson the hard way. I joined a local softball team and almost broke my hand by putting my hand in front of my glove to catch the ball (why!?), I lose at almost scrabble games (I still love it though), but my my mom  put her foot down when it came to baton twirling lessons, thank goodness. And now I'm not even sure why I was interested in taking those!

But I am totally into calligraphy and one of my goals this year is to become super-amazing at calligraphy. I recently took a class on SkillShare and haven’t looked back since, which you've probably noticed on our Instagram. I think this might actually be my thing. In fact, I might be {one day, if I practice} pretty good at it. *gasp* So since I’m basically a calligraphy prodigy (haha) I figured I better fill you in on a few tips since calligraphy is totally trending right now!

how to learn calligraphy

WHAT YOU NEED TO START CALLIGRAPHY:

Things to know :

-This is not your grandmother's calligraphy. But it can be if you want it to be. There are all styles of calligraphy, and I happen to like modern… not traditional.

-Calligraphy supplies really aren’t that expensive. You need:

  • nibs
  • pen
  • paper
  • ink

-You do not have to have amazing handwriting to start calligraphy. If you practice your style enough then you can totally pull it off!

-Calligraphy is super messy, at least for me. Make sure you aren’t writing on a nice desk, because ink will most likely be splattered all over it, and not in a chic way.

-Practice makes perfect, so practice, practice, and practice some more.

Places to learn calligraphy :

-Skillshare > search Calligraphy.  This is where I learned. Since I loved it so much, I'm going to be take more classes, maybe here, maybe one of the awesome places below, to keep learning! Uh, maybe this summer when school slows down. Junior year is buuussssy.

-Fake it ‘till you make it - not really calligraphy, it's, wait for it… how to fake it. Or if you want a true short cut, just buy the font.

-I still love Calligraphy - I don't know much about this, but it looks pretty.

-LH Calligraphy has a a super-cute starter kit on Etsy and a gorgeous Instagram! The price is reasonable too.

how to learn calligraphyphoto via LH Calligraphy

Please let us know if you try any classes and what you think of them, plus tag us and show us your calligraphy skills on Instagram! xo ~chloe

IF YOU ENJOY THIS: check out How to Make A GIF {without Photoshop}


Glitter Lollipops, Part 1

DIY, EXTRAS, RECIPESKim & Chloe22 Comments
DIY-Glitter-Pops-w-pc.jpg

DIY Glitter Pops

As a lover of all things Etsy, all things gold, and anything glittery that doesn't make a mess, it was true love when I discovered Sweet Caroline Confections glitter lollipops. Of course, the first thing that popped in my head was, "I could make those!" Typically, you know the drill, about 50% of our DIYs never make the pages of our blog, but make good stories for Chloe and I to laugh about… later. Once we get over the frustration of having tried to recreate something. But these glitter lollipops are fun and easy to make, and color customizable like our Marshmallow Pops.

Even if our Glitter Lollipops aren't the perfectly round, clear perfection we saw on Etsy, ours are perfect for Valentine's Day (or just change the glitter color and customize them for any occasion, from weddings to prom parties to baby showers, reveal parties, and bar mitzvahs). The possibilities are endless, which is what we adore about the this glittery confection, besides the fact that it only has a few ingredients and is simple to make once you master the technique of the what I prefer to call the "slow pour."  So let's get started!

Glitter Lollipops

Ingredients:

2 cups white sugar 2/3 cup light Karo corn syrup 1/4 cup water edible glitter of your choice {you will also need lollipop sticks, a candy thermometer, and a bowl partially filled with ice water set aside}

Directions:

1. Prepare your work area since it is important that once your candy has finished cooking you can work quickly:

a. If you have granite or marble countertops, lay parchment paper directly on them in long strips. We found this the best method to work quickly. If not, then use cookie sheets lined with parchment paper. (Note: we tried using Silpat, but ended up with a pattern on our lollipops from the sheets. Yours may not make a pattern, so feel free to try it!)

b. Sprinkle your glitter in 3" circles about 3" apart in 2 rows so that lollipop sticks can face in opposite directions and lay completely flat. If you are using candy, then you can place candy into the lollipops after pouring.

2. Place sugar, corn syrup and water in a saucepan with a pouring spout. Stir until the sugar is dissolved while bringing to a boil.

3. Once boiling, place your candy thermometer in the pot and use a pastry brush to wash down the sides so crystals don't form.  Do not stir, but boil until mixture registers 300 degrees to 310 degrees (hard-crack stage) on a candy thermometer, about 5 - 7 minutes.

4. Remove from heat and set in the bowl partially filled with ice water for 15 seconds. It will steam loudly! You want most of the air bubbles to be gone, but don't want the mixture to cool off to much because then it won't pour well - and it cools very quickly!

5. Pour very slowly in the middle of each glitter circle until a circle is formed and press in lollipop sticks. Let sit until completely cooled.

How to Make Glitter Pops - step 5

DIY Glitter Lollipops

Note: I did re-warm the syrup over the lowest heat to soften it slightly when it began to harden. Also, clean-up is easy if you soak everything in very hot soapy water.

Recipe adapted from MarthaStewart.com 

And, if you noticed the title, it says Part 1, so yep, we had so much fun making these, that we'll be back for more ideas after we order a few supplies (hint-hint) for more Glitter Lollipop goodness!

xox, Kim

IF YOU ENJOY THIS: check out our Calligraphy Made Easy & Drink Stirrers


Wrapping Pt. 2: "Snowglobe" Gift Tags

DIYKim & Chloe6 Comments

So we've got our gifts wrapped in a cute wrapping (see our pompom gift wrap) and now it's time for gift tags. We chose to make tags inspired by snow globes. They are not actually snow globes, but these holiday tags totally remind us of them! Shake them up and watch the confetti (or whatever you choose to put inside them) move around. Here's how we made them. Step 1: Gather your supplies:

*we used plastic baggies, but you can use any clear covering such as vellum paper which will give them an "artsy" faded look. We think it would great over a black and white photo with gold glitter "snow"!

supplies for DIY gift tags

Step 2: Make confetti (use a hole punch) or make gold or silver pieces from tinsel or garland. You can also use glitter.snowglobe tags

Step 3: Cut a baggie and use one side as a "wrap" for your tag. You'll be folding it over the top of your tag, so the size baggie you'll need will depend on the size of your tag. We also used vellum paper which gives a completely different look and feel… and the glitter moves more freely without the static from the plastic.

how to make gift tags

Step 4: Make your gift tags or put names on store bought gift tags. We cut corners on our rectangular tags to make them look extra-special gift taggy. (That's a word, right?)

gift tags

Step 5: Use your tape (not pictured in the supplies, oops!) on the back of the gift tag to secure a layer of the baggie on all but one side of the gift tag. On the open side, insert pieces of tinsel, confetti, glitter, etc. Then close the final side and secure. The first photo below (Merry) is using vellum. The others are using plastic.

DIY confetti gift tags

shake it gift tags

make your own confetti gift tags

To attach your gift tag to your gift, be creative! We found these adorable mini clips and decided to spray paint them white to attach them to some gifts. Since the back of our tag isn't as gorgeous as the front, it could also be glued or taped to the gift wrap and the entire gift could be shaken (it's non-breakable!). Whatever you use, make sure your tag can move to show how the tinsel shimmers and shines!

snowglobe tags

That's it… simple, fast and fun. Enjoy!

http://popcosmo.com/wp-content/uploads/2013/12/TAGS .jpeg